


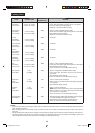
21
Splash Cover:
AT LEAST ONCE A WEEK, REMOVE THE SPLASH COVER AND WASH BOTH SIDES OF IT IN A MILD DETERGENT SOLUTION. A
BUILD UP OF GREASE MAY OVERHEAT AND BEGIN TO SMOKE AND MAY BURN THE SPLASH COVER. THE SPLASH COVER IS
LOCATED IN THE TOP OF THE OVEN AND MAY EASILY BE REMOVED. REMEMBER TO UNPLUG THE POWER CORD. INSTALL
THE SPLASH COVER PROPERLY. OPERATING THE OVEN WITH AN INCORRECTLY INSTALLED SPLASH COVER MAY DAMAGE
THE COMPONENTS IN THE OVEN CAVITY AND SHORTEN THE EXPECTED LIFE SPAN OF YOUR OVEN.
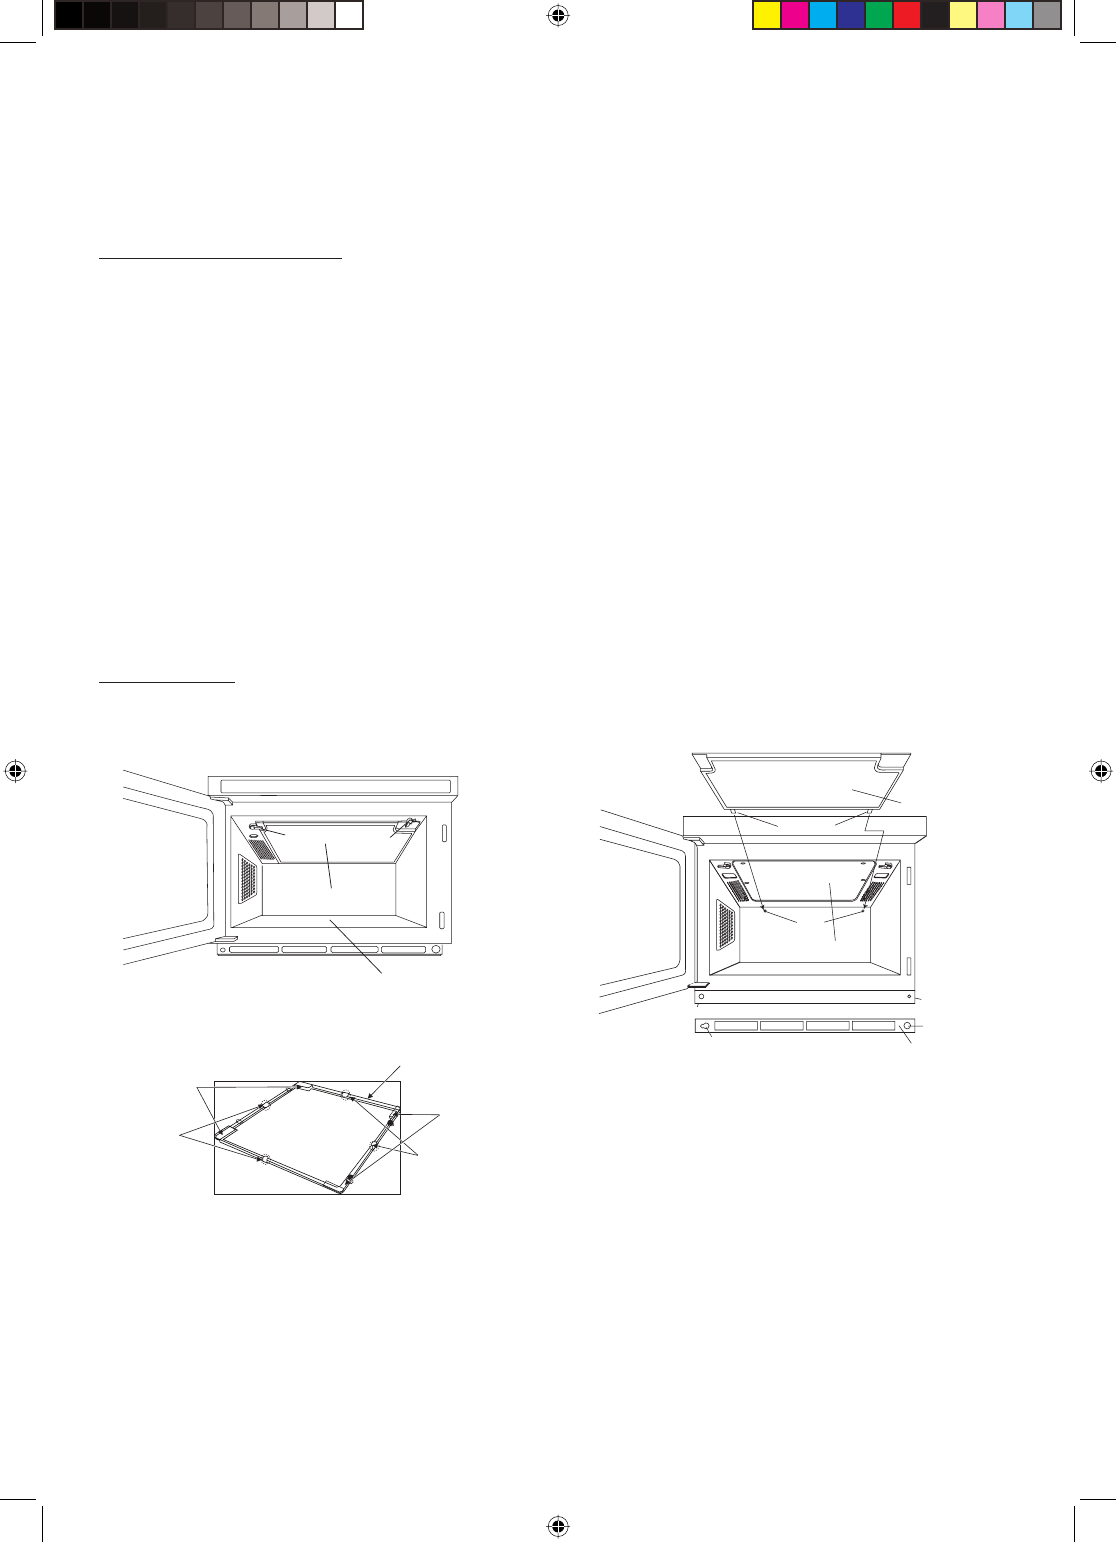
SPLASH COVER (Frame + Cover)
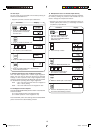
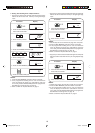
Remove the splash cover as shown in Fig. 2 and separate the frame from the cover.
How to Remove the Splash Cover
Remember to unplug the power cord. Turn the 2 tabs holding the oven ceiling cover to the oven cavity ceiling as shown in
Fig. 2, then gently pull the cover downwards to separate from the oven cavity ceiling. Then separate the cover from the frame.
It is held in place by 4 catches.
COVER:
Wipe any grease, spills or spatters on the oven ceiling cover with a soft cloth dampened with a mild detergent solution.
Don’t soak the splash cover in detergent or wash it.
FRAME:
Wipe any grease, spills or spatters on the frame with a soft cloth dampened with a mild detergent solution. Scrape hardened
spills or spatters with a plastic spatula. Don’t use metallic brushes or sharp-edged tools, as scratches on the frame may
cause the frame to warp or break during heating. To remove hardened spills or spatters, soak the frame in a mild detergent
solution for a short period of time. Don’t use detergent with orange oil, as the frame may melt.
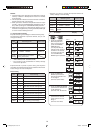
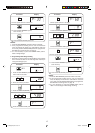
How to Install the Splash Cover
Remember to unplug the power cord. Replace the cover in the frame. Insert projection A (2) into the 2 holes in the rear cavity wall
and then insert projection B (2) into the 2 holes in the oven cavity ceiling as shown in Fig. 2. Then slide the tabs in place.
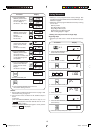
ANTENNA COVER
If antenna cover has grease, spills or spatters, wipe antenna cover with a soft cloth dampened with a mild detergent solution.
Don’t use metallic brushes or sharp-edged tools, as scratches on the antenna cover may cause the cover to warp or break
during heating.
Hole
Pin
Hole
Projection A
Splash Cover
Screw
Fig.2
Hole
Air intake fi lter
Antenna Cover
Tab
Tab
Splash Cover
Fig.1
Ceramic Shelf
Fig.3 Splash Cover
Frame
Catch
Catch
Projection A
Cover
Projection B
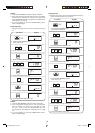
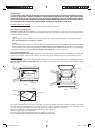
Keep the air intake fi lter clean. Clean the air intake fi lter once every two weeks. (equivalent to 100 hours usage) or more often
for heavy use. See Custom Setting 8 Air Intake Filter Counter on page 12. Loosen the screw holding the air intake fi lter to the
oven and move the air intake fi lter to the left a little bit to remove the air intake fi lter from the pin.
Wash the air intake fi lter in mild soapy water, rinse and dry with a soft cloth.
After cleaning re-install the air intake fi lter.
The screw can be loosened and tightened either by hand or by using a coin.
DO NOT OPERATE THE OVEN WITHOUT THE AIR INTAKE FILTER IN PLACE.
R-1900J [EN].indd Sec1:21R-1900J [EN].indd Sec1:21 4/28/09 10:01:29 AM4/28/09 10:01:29 AM