


-7-
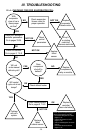
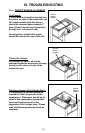
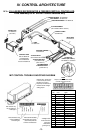
III. TROUBLESHOOTING
III. b - CHECKING FOR FAILED RELAYS:
Checking For A Failed Internal Controller Relay:
1. Gain access to Controller compressor relay (see REMOVAL
INSTRUCTIONS within this service manual for the specific type of
controller your are servicing).
2. Locate the connector with the black/blue/purple wires and unplug it.
Refer to the schematic on the side of the controller, or refer to the
appropriate wiring diagram (to obtain this please contact the factory,
referencing the serial numberof the unit involved).
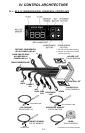
3. Using a volt/ohm meter (VOM) with the power OFF, check the resistance
across the black to blue wires of the Controller connector. If completed
circuit is indicated (with no power to the Controller), the contacts are
stuck closed and the Controller should be replaced (on MIT versions
either the relay box or one of the other relays within the unit need to be
replaced).
Checking For A Failed External “Slave” Relay or Solid State Relay (SSR),
p/n 337-60360-01 (MIT II Only):
1. Gain access to the controller compressor relay (see REMOVAL
INSTRUCTIONS within this service manual for the specific type of
controller your are servicing).
2. Locate the external “slave” relay and unplug the harness connectors.
3. Using a volt/ohm meter (VOM), check the resistance from the “COM”
terminal to the “NO” terminal. If a completed circuit is indicated, the
contacts are stuck closed and the slave relay should be replaced.
4. For the SSR, remove the black and blue wires from terminals 3 & 4. Using
a volt/ohm meter, and with the power OFF, measure the resistance across
the terminals. A completed circuit indicates that the circuit is closed and
that the relay should be replaced. A reading of 25 mΩ to 35 mΩ is
considered normal for an open circuit in the SSR.
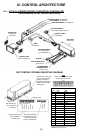
Checking For A Failed Door/Light Relay (R & A Series models only):
1. Gain access to Controller door relay (see REMOVAL INSTRUCTIONS
within this service manual for the specific type of controller your are
servicing).
2. Remove the wire from the door relay coil.
3. Using a volt/ohm meter (VOM), check across the relay contacts. If an
open across the contacts is not indicated, replace the door relay.
NOTE: Equipment manufactured with the MIT II controller version do not
include a Door/Light relay).
4. Physically check the switch for evidence of water. If switch has water in
it, proceed with replacing the switch.