


11
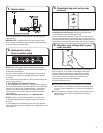
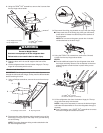
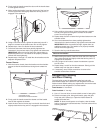
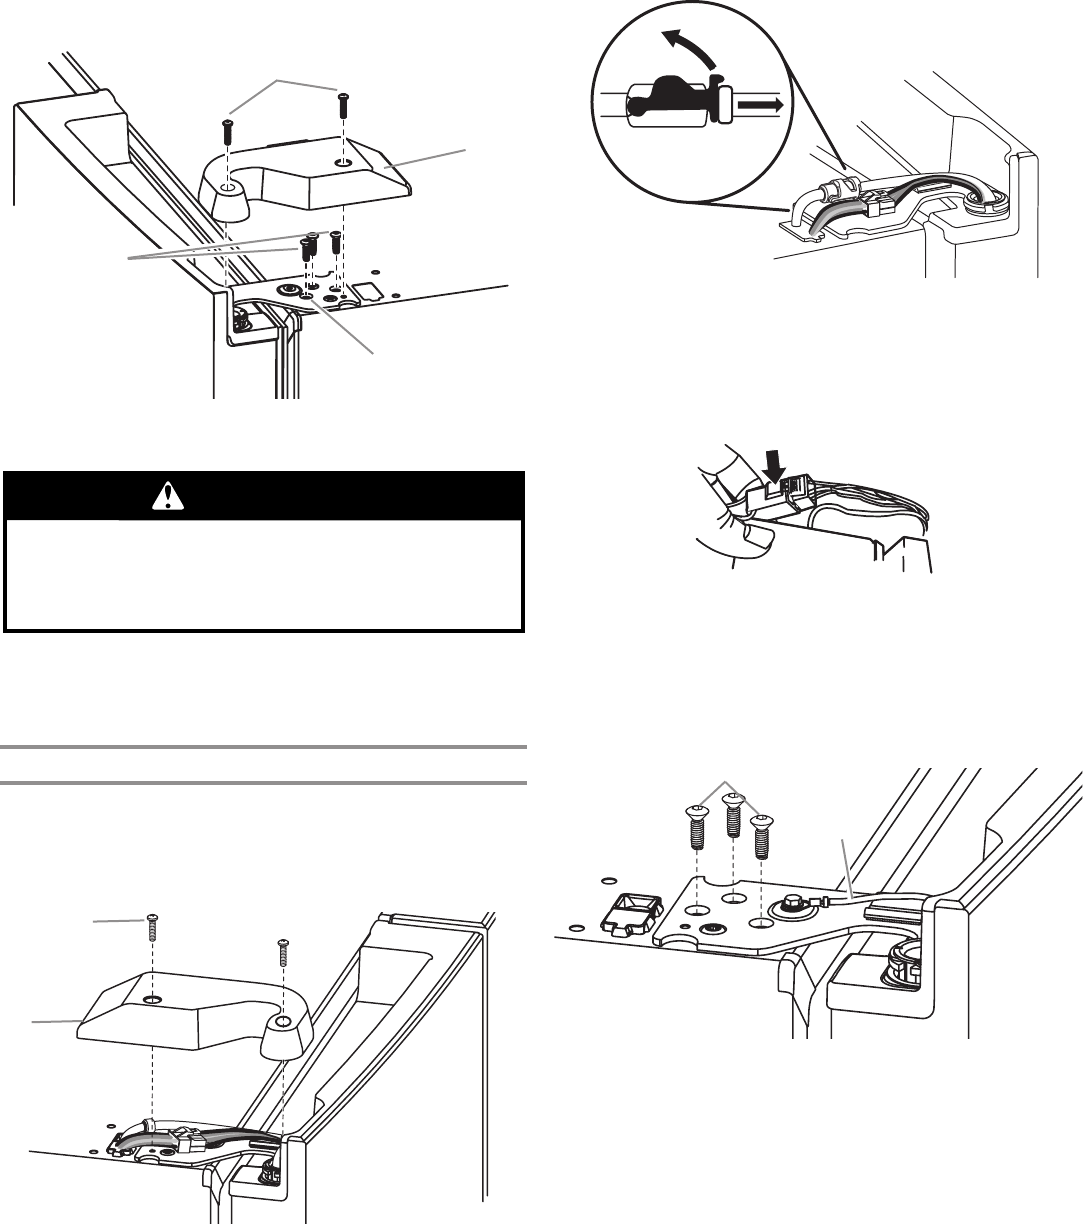
A. Top hinge cover screw
B. Top hinge cover
C. TORX
®
T25
®
screws
D. Top hinge
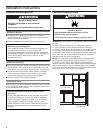
WARNING
Excessive Weight Hazard
Use two or more people to lift the refrigerator door.
Failure to do so can result in back or other injury.
5. Open the door until it is at a 90° angle to the front of the
cabinet.
6. Lift the refrigerator door from the bottom hinge pin. The top
hinge will come away with the door.
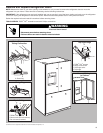
Remove Left-Hand Door
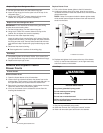
IMPORTANT: The tubing and wiring for the water dispenser run
through the left-hand door hinge, so they must be disconnected
before removing the door.
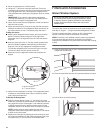
1. Using a Phillips screwdriver, remove the cover from the top
hinge.
A. Top hinge cover screw B. Top hinge cover
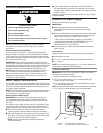
2. Disconnect the water dispenser tubing located on top of the
door hinge. Firmly pull up on the clasp. Then, pull the tubing
out of the fitting.
NOTE: The water dispenser tubing remains attached to the
left-hand refrigerator door.
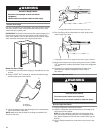
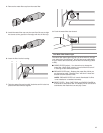
3. Disconnect the wiring plug located on top of the door hinge.
■ Grasp each side of the wiring plug. With your left thumb,
press down to release the catch and pull the sections of
the plug apart.
NOTE: Do not remove the green ground wire. It should
remain attached to the door hinge.
A
B
D
C
A
B
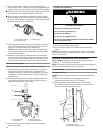
A. TORX
®
T25
®
screws
B. Ground wire (Do not remove.)
4. Using the TORX
®
T25
®
screwdriver, remove the 3 internal
screws from the top hinge and set aside.
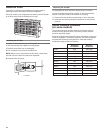
NOTES:
■ Provide additional support for the refrigerator door while
the hinges are being removed. Do not depend on the door
gasket magnets to hold the door in place while you are
working.
A
B
5. Lift the refrigerator door from the bottom hinge pin. The top
hinge will come away with the door.
NOTE: It may not be necessary to remove the bottom hinges
and brake feet assemblies to move the refrigerator through a
doorway.
■ Only if necessary, use a TORX
®
T25
®
screwdriver to remove
the bottom hinges and brake feet screws.
4. Using the TORX
®
T25
®
screwdriver, remove the 3 screws from
the top hinge and set aside.