VARIETY STEAMER
16
P/N 1010745 Rev. G 03/06
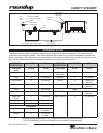
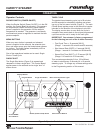
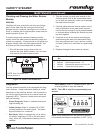
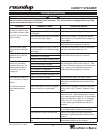
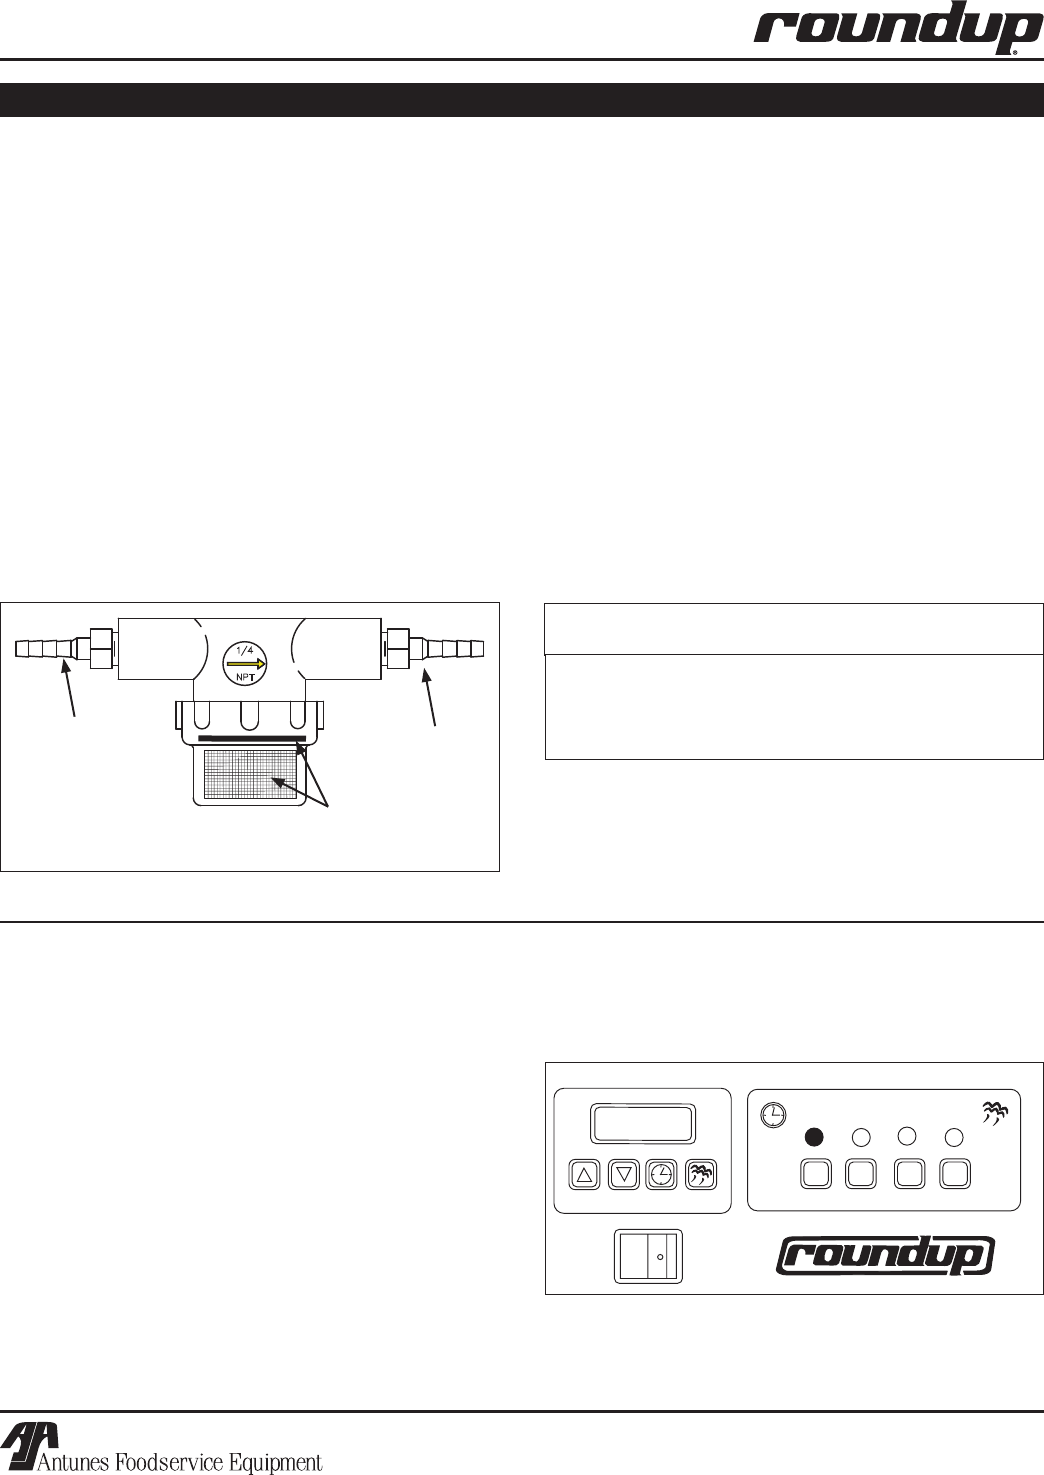
Diagnostics
The four-channel controller is also equipped with diag-
nostic features. Listed under each drawing is a brief
description of the particular feature. Also contained in
the control housing mounted on the control board are
diagnostic LED’s. They are in three colors and repre
-
sent the following:
* Green (Program): When lit, indicates factory set-
tings are being set.
* Yellow (Audio): When lit, indicates 10-15 VDC
is being supplied to the audio signal. The Audio
Signal will sound for 3 seconds.
* Red (Heat):
When lit, indicates the unit is calling
for heat by supplying 3-5 VDC to the solid state
relay. When off, it indicates the heating circuit is
satisfied.
UP
DOWN
PROGRAM SINGLE SHOT
1 2 3 4
SH OT
HIGH will be displayed when the generator tempera-
ture exceeds the setpoint temperature by 50°F (10°C).
HIGH
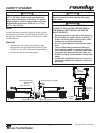
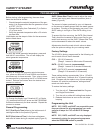
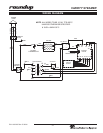
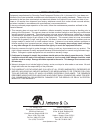
Checking and Cleaning the Water Strainer
Monthly
GENERAL
The Water Strainer protects the unit from any foreign
debris in the water line that could get into the food,
damage the unit’s solenoid (causing the unit to leak or
flood), or interfere with the equipment’s proper and con-
sistent operation (Figure 10).
To ensure proper and consistent steaming results,
visually check the water pressure regulator gauge and
strainer cup regularly. If the pressure on the gauge has
dropped, visually check the clear plastic strainer “cup”
and clean out the accumulated deris as follows.
1. Shut off the water supply valve to the unit,
unscrew the clear plastic strainer “cup” and care-
fully remove the mesh strainer screen.
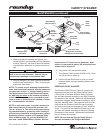
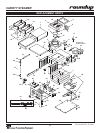
Item Part Description Qty.
No.
1 7000333 Water Line Strainer Kit 1
2 2040130 Male Adapter, barbed - 1/4” 2
3 7000334 Replacement Screen and O-ring Kit 1
4 2110104 Clamp, Worm (Not shown) 2
2. Take the strainer cup and mesh strainer to the
sink and gently flush all the accumulated debris
out of them, be especially careful not to damage
the mesh strainer screen.
3. Carefully place the mesh strainer screen into its
seat at the bottom of the clear plastic cup and
confirm that the orange O-ring is properly seated
in its place before screwing the Strainer cup and
top back together.
4. Purge the air out of the strainer and tubing by
disconnecting the male quick disconnect fitting
from the equipment and, over a bucket, pushing
its “white” plastic tip in until there is a good water
flow.
5. Replace damaged or worn parts as needed.
2
2
3
NOTE: Item 1 is made up of
shown items 2-4.
Figure 10. Water Line Strainer Kit
MAINTENANCE (continued)
* Green (Water): When lit, indicates that 24 VAC is
is being supplied to open the solenoid.
NOTE: This LED is only lit for approximately one
second.