


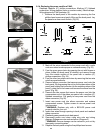


Diagram 5
Figure 39
Figure 38
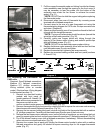
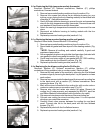
Figure 37
Figure 36
Figure 35
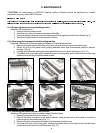
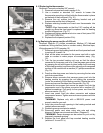
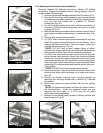
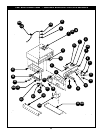
8. Remove the two screws and nuts securing the clips that attach the
copper thermostat probe to the motor bracket. Use a medium
flathead screwdriver. (Fig. 38)
9. Pull copper probe and tubing from fan blower motor area through the
opening to the front panel.
DO NOT bend or kink the copper tubing when replacing the
thermostat probe.
10. Disconnect wires from rear of thermostat by reversing screw
terminals with a flathead screwdriver.
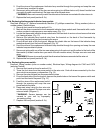
11. Connect wires to the rear of a new thermostat unit using the
thermostat wiring diagram for CA43 units. Re-tape over wire nuts
and wires. (Diagram 5)
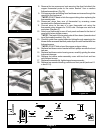
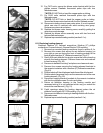
12. Attach new thermostat to rear of front panel and bezel to the front of
panel with the two phillips screws.
The tops of the terminals should face down (toward actual
top of the heating module). (Fig. 39)
13. Carefully guide new copper probe and tubing through opening to fan
blower motor area and reattach probe clips to motor bracket with two
flathead screws.
DO NOT kink or bend the copper probe or tubing.
14. Replace fan blower motor bracket with two phillips screws front and
two rear.
15. Replace fan blower motor housing cover, carefully guiding the wires
to prevent damage.
16. Replace fan blower motor assembly cover with two front and two
rear flathead screws.
17. Replace thermostat dial, tightening set screw securely.
18. Replace top mounted heating module and front panel (sections 6-1
a. and 6-1 b).
**NOTE:
**NOTE:
**NOTE: