


Figure 43 Figure 44
Figure 45
Figure 42
Figure 41
Figure 40
6-1k. Replacing the fan blower motor assembly.
**NOTE:
**NOTE:
**NOTE:
Required: Medium (6") flathead screwdriver, Medium (6”) phillips
screwdriver, Crescent or standard wrench, Wiring markers (color or
number codes), Electrical tape
1. Remove top mounted heating module as found in section 6-1a.
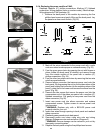
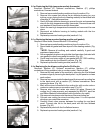
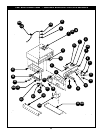
2. Remove the fan blower motor assembly cover (on the left side
of module as you are facing the front panel) by removing the two
front and two rear screws with a medium (6”) flathead
screwdriver. (Fig. 40)
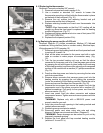
3. Pry off fan blower housing cover (with a flathead screwdriver, if
necessary). Without disconnecting wires, set cover on a clean
work area. (Fig. 41)
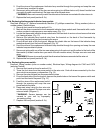
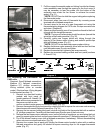
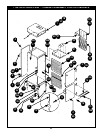
4. Mark all the wires connected to the fan blower motor(s) with a
color code or number to make proper re-connection easy. (Fig.
42)
5. Remove wire nuts and set cover aside.
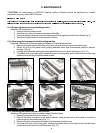
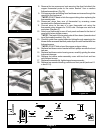
6. For CA70 units, remove the two screws securing the clips that
attach the copper thermostat probe to the fan blower. Use a
medium flathead screwdriver. Free the copper probe and
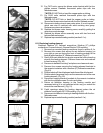
carefully set out of the way. (Fig. 43)
DO NOT kink or bend copper tubing or probe.
Remove four screws (two at each end) that hold the fan blower
motor bracket in place. Use a medium flathead screwdriver.
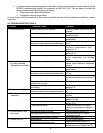
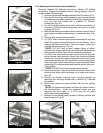
7. For CA43 units, remove four screws (two at each end) that hold
the fan blower motor bracket in place. Use a medium flathead
screwdriver. Gently lift bracket to expose mounting clips for the
copper thermostat probe. Remove the two screws securing the
clips holding the copper thermostat probe with medium flathead
screwdriver. Free copper probe and carefully set out of the way.
(Figs. 44 &45)
DO NOT kink or bend copper tubing or probe.
8. Remove fan blower motor bracket with fan blower motor(s) still
attached and place entire assembly on a clean work space.
(Fig. 46)
9. Remove fan blower motor(s) from mounting bracket by
removing four securing screws with a medium (6”) flathead
screwdriver.
10. Mount new motor(s) in same position with the four phillips
screws.
All replacement motors will have two drilled holes in
the blower portion - these are irrelevant unless you are
replacing the front motor on a CA70 and will not affect
performance in any application.
11. Replace the fan blower motor bracket in heating module with
large flange up. (Fig. 46) .