


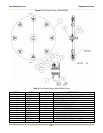
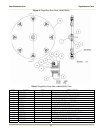

Gas Rotisserie Oven Installation
10
If you are unable to do this, drill a small ¼” hole through the back flange of the shelf, then follow
the restraining device manufacturer instructions to finish the installation.
Use appliance connectors and quick-disconnect devices that are in compliance with the
applicable ANSI and CSA standards.
2. Attach an appliance connector to the oven according to the instructions provided by the appliance
connector manufacturer.
3. Connect the gas supply to the oven. In Europe, the gas supplier must provide the gas hookup connecting
line.
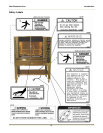
4. Lock the casters so the oven does not move. Every time you use the oven, make sure the casters are
locked so the oven cannot move. (In Canada: refer to caster codes CAN 1-6.10 M88 and CAN 1-6.9
M79.)
5. Turn on the gas at the gas supply valve.
6. Check for gas leaks from the gas supply to the oven gas valve using a soap and water solution. If a leak
is detected, tighten the connection where the leak occurs.
7. Connect the three-prong (grounded) plug directly into a properly grounded three-prong receptacle.
8. Apply power to the oven.
9. Perform the following procedures provided in the Startup and Checkout section of the VR8105, VR8205,
and VR8305 Direct Ignition Combination Gas Controls Installation Instructions (69-1226-2). Refer to
Appendix A.
• Perform Gas Leak Test
• Turn On System
• Turn On Main Burner
• Check and Adjust Gas Input Burner Ignition (for Standard model Pressure Regulator)
10. Place the HEAT switch, LOWER FLAME switch, and LIGHTS switch in the “OFF” position.
11. Wait at least five minutes to allow oven to cool.
12. Place the POWER switch and ROTOR switch in the “OFF” position.
Gas Conversion Instructions
To convert the gas system from a Natural Gas to LP Gas application or vice versa, contact the BKI Technical
Service Department, toll free: 1-800-927-6887. Outside the U.S., call 1-864-963-3471.