


909A & 919A OWNER/OPERATOR MANUAL • 15
CLEANING THE KNIFE
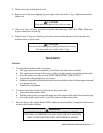
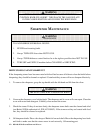
WARNING
THE KNIFE BLADE IS EXPOSED DURING
THESE CLEANING STEPS.
The stainless steel knife will corrode if not properly cleaned and maintained. To properly clean the knife:
1. Make sure thickness control knob is as far to the right as possible.
2. Clean front side of knife using wet sponge or wet towel. To avoid contact with cutting edge, WIPE
FROM CENTER TO OUTER EDGE. Turn the knife from the backside with left hand.
3. Clean backside of knife. Rotate knife downward with sponge or towel. Then wipe with upward
motion. Repeat until clean.
4. CLEAN TOP OF GAUGE PLATE ONLY WHEN IT IS IN THE CLOSED POSITION. Using a wet
sponge or wet cleaning towel, wipe the gauge plate always AWAY FROM THE KNIFE.
5. Clean the knife box ONLY with the cleaning brush supplied with the machine.
6. Clean the back of the knife box area with the cleaning brush.
7. Rinse with clean water, sanitize and allow to dry. Berkel recommends using USDA-approved
sanitizer (P/N 4975-00400).
REASSEMBLY
1. Reassemble removable parts that have been cleaned and sanitized.
2. Grasp center plate with left hand on top knob and right hand on the bottom. Align elongated hole
onto stationary pin. Bring plate forward, align center plate locating holes with knife guard locating
pins. With left hand, raise locking knob and lower center plate into place. Release locking knob.
3. Replace slice deflector. Hook the top pin first, then push down slightly on the lower hinge tab and
hook the bottom locking pin. Snap closed.
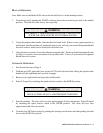
NOTE: If knife is dull, sharpen knife per procedure on Page 17.
4. Replace product table. The product support arm must be fully forward before the table can be
installed. Hold the product table with both hands and carefully lower it in place.
5. Tighten the locking knob.
6. Oil pusher shaft. Move the pusher up and down and coat the rod with a thin film of Berkel USDA-
authorized oil.