


909A & 919A OWNER/OPERATOR MANUAL • 7
2. Tip the slicer onto a thick pad of cloth.
3. Remove one of the short shipping legs and replace with one of the 4” legs. Tighten and install a
rubber foot.
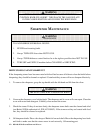
CAUTION
Never have more than one leg loose at a time.
4. Once one 4” leg is in place, proceed to install the other three legs, ONE AT A TIME. Make sure
to put a rubber foot on each leg.
5. When all four 4” legs are installed, get assistance from another person to lift and position the
machine where it will be used.
CAUTION
Do not set slicer upright by pulling it forward on two legs.
You may break one or both of the 4” legs.
ASSEMBLY
GENERAL
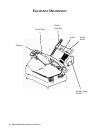
1. To assemble the product table on the slicer:
a. The gauge plate must be completely closed before the table can be installed.
b. The support arm must be in the home, or fully forward position to mount the product table.
c. Since the pusher can slide or rotate, KEEP THE SLICING TABLE LEVEL.
d. Loosen the locking knob but do not remove.
e. Hold the slicing table with both hands and lower it carefully into the slot of the support arm until
it is against the stop.
f. Tighten the locking knob.
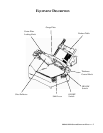
2. To release the product pusher from the end of the product table:
a. Grasp the product pusher knob.
b. Pull the pusher gently up toward the upper end of the product table and lift free from the stop.
c. Lower the pusher gently until it rests at the bottom of the product table.
3. Put a few drops of the sample Berkel USDA-authorized food machine oil supplied with the slicer
on the product pusher slide bar.
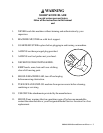
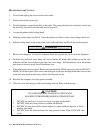
WARNING
USE ONLY USDA-AUTHORIZED OIL ON THIS MACHINE.
NON USDA-AUTHORIZED OIL MAY CONTAMINATE MACHINE
AND CAUSE FOOD POISONING AND PERSONAL INJURY.