


107
7
7
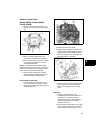
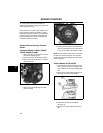
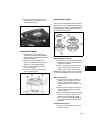
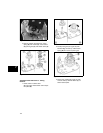
Inspect Rewind Starter Parts
NOTE: Do not remove the spring from the pulley.
Both parts are serviced only as an assembly.
1. Inspect the pulley for wear, cracks, rough
edges, or burrs in the rope groove and
look for wear in the center hole. If wear or
damage is found, replace the pulley and
spring assembly.
2. Inspect the spring for broken ends, kinks,
or burrs. If damage is found, replace the
pulley and spring assembly.
3. Inspect the starter housing for wear or
burrs at the rope eyelet, the center pivot
post, and the anchor tab. If damage is
found, replace the housing.
4. Inspect the drive pawls for wear at the tips
or pivot points. Replace pawls if worn.
5. Inspect the rope for broken or frayed
areas. Replace rope if necessary.
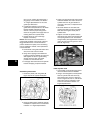
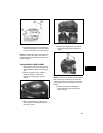
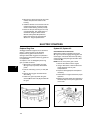
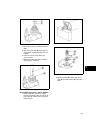
Assemble Rewind Starter
1. Install pulley and spring assembly into
starter housing. Rotate pulley clockwise
until slight resistance is felt, which
indicates that the spring has engaged in
the anchor tab.
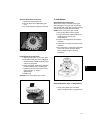
2. Install pawl springs (if used) and pawls.
Position retainer plate on pulley. Ensure
that the slots in the retainer fit over the
tabs in the pulley, then install shoulder
screw. torque screw to value shown in
Section 12 - Engine Specifications.
3. While holding retainer, rotate the pulley to
extend and retract the pawls. If they do not
move properly, remove and reinstall the
retainer plate.
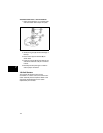
4. Turn pulley clockwise until the spring is
wound tight. Then allow pulley to unwind
slightly until the hole in the pulley and the
eyelet in the housing are lined up.
Securely clamp the pulley and housing
together to prevent the pulley from
spinning.
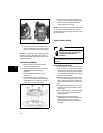
NOTE: Before proceeding, consult the Illustrated
Parts List or Section 12 - Engine Specifications
to ensure correct diameter and length of rope is
being installed.
5. Insert one end of starter rope through
eyelet and then through hole in pulley. Tie
an overhand knot in end of rope, then pull
rope until knot is seated in pulley. Trim
excess rope if necessary.
6. Slip other end of rope through handle and
insert. Tie a knot in end of rope, then pull
rope until knot is seated in the insert. Trim
excess rope if necessary.
7. Quickly burn each end of the rope with an
open flame to prevent swelling and fraying
of the weave. Then press the handle insert
into the rope handle.
8. Carefully release the clamp on the starter
and allow the pulley to SLOWLY unwind
until the rope is retracted. Smoothly pull
the rope handle several times to ensure
proper operation of the starter assembly.
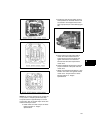
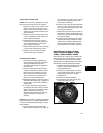
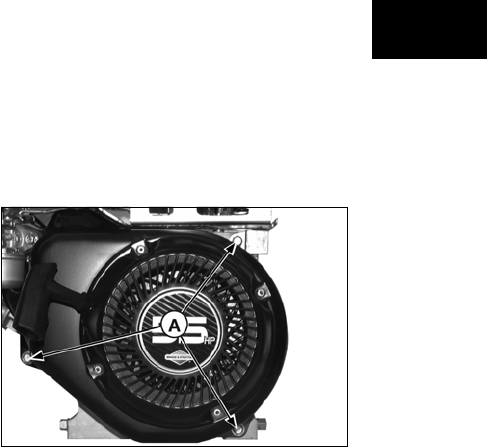
Install Blower Housing / Rewind
Starter Horizontal Models 110000,
120000, 150000, 200000, 210000
Some starters are riveted or spot welded to the
blower housing and must be drilled to remove.
For installation, screws and nuts are available
separately from the Illustrated Parts List and are
included with complete replacement starters.
1. Install the blower housing and torque the
screws to values listed in Section 12 -
Engine Specifications.
2. Install the screws (A, Figure 10) and the
control panel trim torquing the screws to
values listed in Section 12 - Engine
Specifications.
3. Install the air cleaner assembly.
4. Fill fuel tank or open fuel shut-off valve.
Connect the spark plug wire.
Figure 10