


84
4
4
• Choke shaft and choke valve
• Throttle shaft and throttle valve
• All passages, openings, and the inside
and outside of the carburetor body
NOTE: Do not soak non-metallic components,
such as floats, o-rings, seals, or diaphragms, in
carb/choke cleaner or they will be damaged.
4. If any passages remain plugged after
cleaning, replace the component or the
entire carburetor assembly.
Assemble Carburetor
1. Install new welch plug with pin punch of
slightly smaller diameter than the plug.
Press against the plug until it is flat in the
carburetor opening. Do not cave in the
plug. Seal the edge of the plug with a non-
hardening sealant.
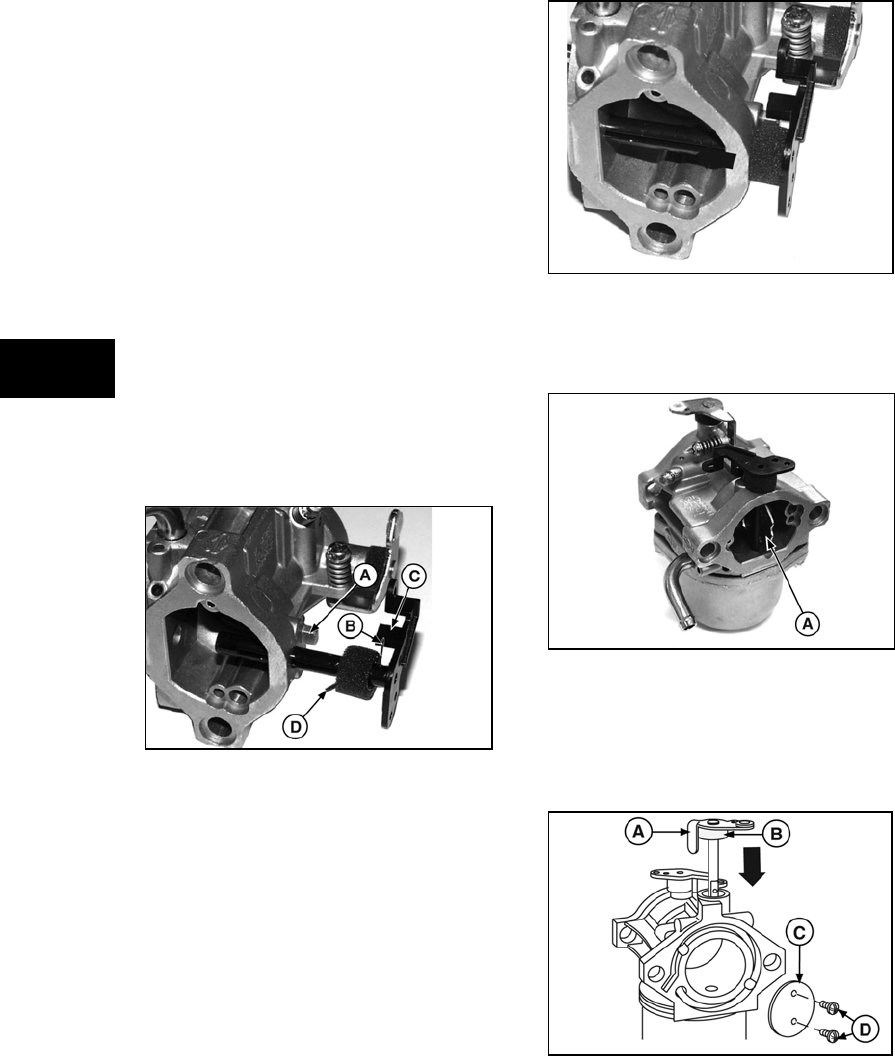
2. Reinstall main jet and seal
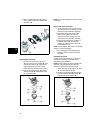
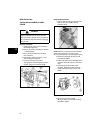
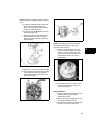
3. Install new seal and spring on the choke
shaft with the top of the spring contacting
the choke shaft lever (B, Figure 63).
Figure 63
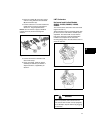
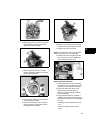
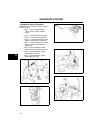
4. Turn the choke shaft counterclockwise
while gently pushing it into the carburetor
body until the bottom end of the spring (D)
rests on the back of the spring perch (A).
5. Lift the choke shaft up slightly and
continue turning counterclockwise until the
stop on the lever clears the spring perch.
Push the shaft inward. When released, the
choke shaft lever should rest on the spring
perch as shown (Figure 64).
Figure 64
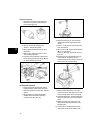
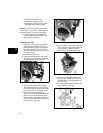
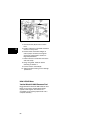
6. Insert the choke plate into the choke shaft
with the dimples toward the fuel inlet side
of the carburetor. Dimples center the
choke plate on the shaft (A, Figure 65).
Figure 65
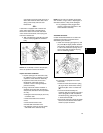
7. Install foam washer (B) to throttle shaft
(A, Figure 66). Install throttle shaft to the
carburetor body. Turn throttle shaft until
flat is facing out.
8. Lay the throttle plate (C) on the flat of the
shaft. Install two screws (D).
Figure 66