


Page 5
INITIAL SET-UP
CAUTION – The brewer must be disconnected from the power source throughout the initial set-up, except when
specified in the instructions.
NOTE: ECA Models Only - This brewer is equipped with a temperature sensor that indicates when to brew and, when
selected, locks-out the start of a brew cycle until the water has heated to the optimum brewing temperature.
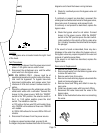
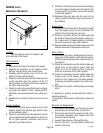
1. Remove the front panel beneath the sprayhead.
Models with electronic control assemblies:
Place the tank heater switch at the top of the control assembly in the “OFF” position.
Models with electro/mechanical thermostats:
Rotate the control thermostat knob fully counterclockwise to the “OFF” position.
2. Connect the brewer to the power source. Water will begin flowing into the tank.
3. When water stops flowing into the tank, remove the front panel and proceed as directed:
Models with electronic control assemblies:
Place the tank heater switch at the top of the control assembly in the “ON” position and replace the front panel.
Models with electro/mechanical thermostats:
Rotate the control thermostat knob fully clockwise to the “ON” position and replace the front panel.
4. Wait approximately twenty-five minutes on 208V, 240V Models or fifty minutes on 120V Models for the water
in the tank to heat to the proper temperature.
5. Place an empty server beneath the brew station. Place the Selector switch in the desired position, the On/Off
switch in the upper position and initiate a brew cycle
6. Place the On/Off switch in the lower “OFF” position after water has stopped flowing from the funnel, and check
the water volume in the server. It should be 64 oz -1/2 gallon, 128 oz - 1 gallon or 224 oz - 1-3/4 gallon.
NOTE: Brewer will not operate if the server size does not match the selected batch size.
7. (A) If not, disconnect the brewer from the power source, remove the front panel, and adjust the timer as
required. Refer to Adjusting Brew Volumes. Replace the front panel, connect the brewer to the power source,
allow the water to reheat, start, and measure another brew cycle.
(B) If necessary adjust the needle valve to achieve water volume to be bypassed around the coffee filter in the
funnel.
NOTE: To increase the water bypass turn the needle valve counterclockwise, to decrease the water bypass turn
the needle valve clockwise. An adjustment to the needle valve will require a timer adjustment for volume.
8. Repeat step 7 until the proper water volume is achieved.
9. The brewer is now ready for use in accordance with the coffee brewing instructions.
27118 100400