


Adding or Modifying Subscriber Table Entries 4-7
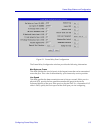
Configuring the Subscriber Table
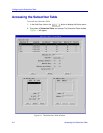
c. Click Yes on the Systematic Redirect option if you wish all calls to this
subscriber to be redirected to the first alternate address defined in the
Address Table. If you select this option,
no calls
will be received by the
original subscriber, and only the first alternate subscriber will be used.
Select No if you do not wish to redirect calls in this way.
d. Click Yes on the Redirect Busy option if you wish calls to this subscriber
to be redirected to the defined alternate addresses when the original
subscriber device is busy. Select No if you do not wish to redirect calls in
this way.
e. Click Yes on the Redirect Out-of-Order option if you wish calls to this
subscriber to be redirected to the defined alternate addresses when the
original subscriber device is down. Select No if you do not wish to redirect
calls in this way.
f. Use the Priority field to configure the priority level that will be assigned to
this subscriber’s calls relative to other intra-nodal traffic. The higher the
priority value, the higher the priority assigned to that subscriber’s calls.
(Note that this value does not effect traffic exiting the device.)
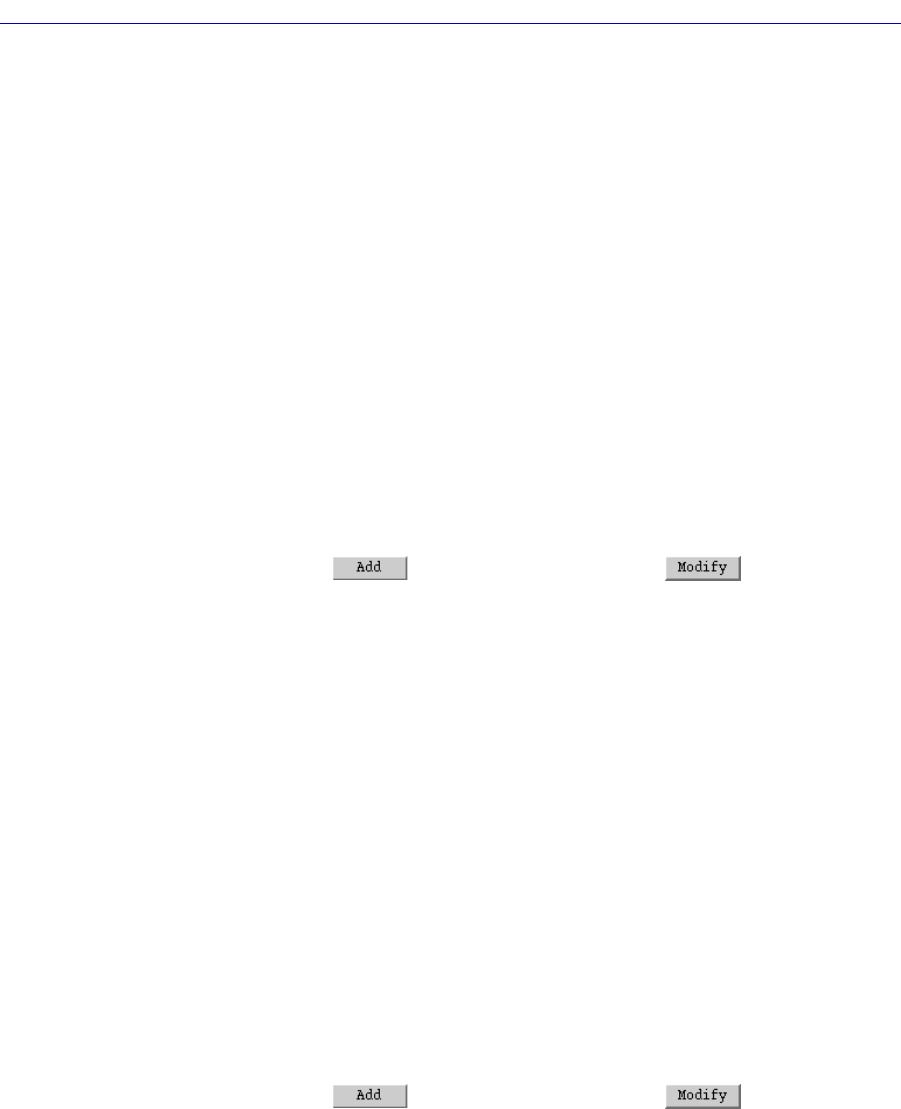
g. Click on to create a new entry, or on to edit the entry
currently selected in the Subscriber Table list box.
3. In the Routing Table:
a. If you wish to modify an existing Routing Table entry, be sure that entry is
selected (and remember, any changes you make to the Routing Table
effect the Subscriber Table entry currently highlighted in the top portion of
the window).
b. In the Path field, enter the index number you wish to assign to the path
you are configuring. These index values will be used in some cases to
determine the order in which the routing paths will be selected; note that
these values must be assigned sequentially.
c. In the LP field, enter the index number of the RLP card which contains the
physical or logical port you wish to use to reach the subscriber device.
Note that, for an FRX4000 and SmartSwitch 1800, this value will always
be zero.
d. In the Port field, enter the index number of the physical or logical port you
wish to use to reach the subscriber device. Index values 0-7 refer to
physical ports on the selected RLP; values 8-63 denote logical ports.
e. Click on to create a new entry, or on to edit the entry
selected in the Routing Table list box. (Note that either adding or
modifying a Routing Table entry automatically modifies the Subscriber
Table entry highlighted in the Subscriber Table list box.)