


11
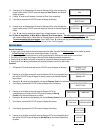
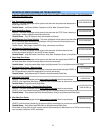
13. Pressing any of the Dispense keys will cause the Dispense LED(s) of the corresponding
Hopper to blink and the LCD/VFD screen will display the Gram Throw for the indicated
Hopper as follows:
GRAM THROW
###
14. Pressing ▼or ▲ key will decrease or increase the Gram Throw respectively.
15. If the Stop key is pressed the LCD/VFD screen will display the following:
HOPPER STATUS
SELECT A KEY
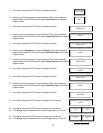
16. Pressing any of the Dispense keys will cause the Dispense LED(s) of the corresponding
Hopper to blink and the LCD/VFD screen will display the Status for the indicated Hopper as
follows:
HOPPER
STATUS ON
HOPPER STATUS
OFF
17. If the ▼or ▲ keys are pressed the Hopper Status will toggle between “on” and “off”.
Note: IF either the Auger Motor, or Mixer Motor, or Solenoid Error Screen appear: The entire system is inoperable this means that
one of either the Auger Motor, or Mixer Motor, or Solenoid [Dispense Valve] is not functional while that Hopper Status in ON.
To continue operating the other Hoppers:
Press RINSE, Press ▼or ▲ key until you get the HOPPER STATUS screen, Set the
non-functional HOPPER STATUS to OFF, Wait at least 10 sec., then Exit program.
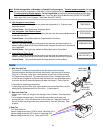
SERVICE MODE
General Conventions:
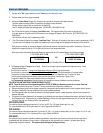
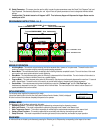
1. To enter or exit Service Mode simultaneously depress both the hidden key behind the Cecilware Logo
and the hidden key behind
the Fast Flow Logo
until the buzzer sounds (approximately 1.5 seconds).
2. Pressing the Stop key will cause the menu to scroll up and pressing the Rinse key will cause the menu to scroll down.
3. The blinking LED(s) signify which Hopper or Serving Size the displayed parameter corresponds to.
4. Pressing the ▼and ▲keys individually will decrease or increase the displayed parameter respectively.
5. Pressing the ▼and ▲keys simultaneously will cause the parameter to revert to a default value.
Functions:
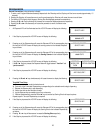
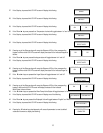
1. All Dispense LED’s will be illuminated and the LCD/VFD screen will display the following: DISPENSE TOTAL
SELECT A KEY
2. Pressing any of the Dispense keys will cause the Dispense LED of the corresponding key to
blink and the LCD/VFD screen will display the serving counter for the indicated Dispense
key as follows:
DISPENSE TOTAL
#######.# OZ.
3. Pressing the ▼and ▲ keys simultaneously will reset the Dispense Total for the indicated Hopper.
4. If the Stop key is pressed the LCD/VFD screen will display one of the following: SERVING COUNTER
SELECT A KEY
5.
.
Pressing any of the Dispense keys will cause the Dispense LED of the
corresponding key to blink and the LCD/VFD screen will display the Serving
Counter for the indicated Dispense key as follows:
SERVING COUNTER
SELECT A KEY
SERVING COUNTER
##### CUPS
6. Pressing the ▼and ▲ keys simultaneously will reset the Serving Counter for the indicated Dispense key.
7. If the Stop key is pressed the LCD/VFD screen will display the following:
DISPENSE MODE
FREE FLOW
DISPENSE MODE
PORTION CONTROL
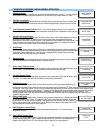
9. If the Stop key is pressed the LCD/VFD screen will display the following:
SERVING SIZE
SELECT A KEY
10. Pressing any of the Dispense keys will cause the Dispense LED of the corresponding key to
blink and the LCD/VFD screen will display the Serving Size for the indicated Dispense key
as follows:
SERVING SIZE
##.## OZ.