


10
Installation Instructions
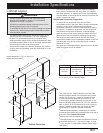
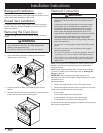
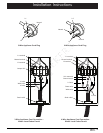
Backguard Installation
If installing a backguard or changing the factory installed
backguard, install it before moving the range into position. Do not
install a backguard if installing a raised vent.
Raised Vent Installation
If installing a raised vent, install it before moving the range into
position. Install trim kit PN ATKR30SR to cover the front of the
raised vent chassis.
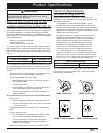
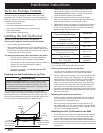
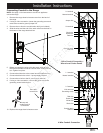
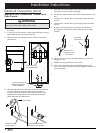
Removing the Oven Door
To make the range easier to move, remove the door to reduce
weight.
WARNING
• Do not attempt to disengage the hinge catches with the
door removed from the oven. The hinge springs could
release, causing personal injury.
• Do not lift or carry the oven door by the door handle.
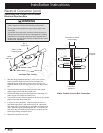
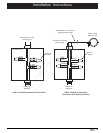
1. Open the door to its fully opened position.
2. Using a flat blade screwdriver, rotate the catch over the
retaining arm on each hinge.
3. Lift the oven door to about a 15° angle from the vertical
position.
4. Hold the door with both hands just below the handle and pull
it away from the oven while continuing to lift.
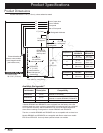
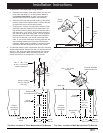
Electrical Connection
WARNING
• Before proceeding, turn off power to the circuit to which the
appliance will be connected at the circuit breaker panel or
fuse box.
• If the electric service provided does not meet the product
specifications, do not proceed with the installation. Call
the appliance dealer or a licensed electrician. Improper
connection of the electrical wiring can cause an electric
shock hazard and damage the appliance. Dacor is not
responsible for damages resulting from improper installation.
• This range must be connected to a grounded, metallic,
permanent wiring system. Alternatively, a grounding
conductor should be connected to the grounding terminal or
lead on the appliance.
• Do not use a 3-wire connection unless local building codes
permit.
• Do not turn on power to the appliance until the range is
permanently grounded.
• Do not use an extension cord with this appliance. Such use
may result in fire, electrical shock or other personal injury.
• Do not install a fuse in the neutral or ground circuit. A fuse
in the neutral or ground circuit may result in an electrical
shock hazard.
NOTE: If the appliance is connected to a 208 volt power supply,
preheat times and cavity temperature recovery times will be
increased slightly.
NOTE: Model numbers ending with a -C come from the factory
pre-wired. If installing a pre-wired range, skip to Installing the
Range on page 16.
IMPORTANT: When connecting the range wiring, do not
disconnect any of the wires inside the range electrical box unless
instructed to do so.
Before proceeding:
1. Position the range directly in front of the cabinet cutout.
2. Remove the electrical access cover on the back of the range.
There are four possible ways to wire the range:
• 4-wire conduit
• 3-wire conduit (where local codes permit)
• 4-wire appliance cord (where local codes permit)
• 3-wire appliance cord (where local codes permit)
The sections on the following pages give directions for connecting
each type of wiring harness.