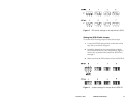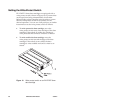
When power is applied, the tape drive performs its
power-on initialization and self-test (POST). Assuming
that no data cartridge is loaded and that the tape drive is
connected correctly, POST takes about 65 seconds, as
follows:
■
During the first part of POST, both the amber and
green LEDs are lit.
■
During the second part of POST, various
combinations of the LEDs may be lit, depending on
whether the tape drive is connected to the SCSI bus
and whether a data cartridge is loaded.
■
After the power-on initialization and self-test have
completed, both LEDs will be turned off if there is no
data cartridge loaded. If a data cartridge is loaded,
the green LED will remain on.
Important
If the amber LED does not go out after the
power-on initialization and self-test are complete,
an error has occurred. Contact your vendor.
When POST completes, the tape drive is ready for normal
operation.
Tape Drive Stored for Six Months or More
If the tape drive has been stored for six months or more,
perform the following steps using your backup software
to ensure that the tape drive’s internal lubrication is
properly distributed:
1. Apply power to the tape drive. The tape drive
performs its POST as on page 20.
2. Locate a data cartridge that does not contain any
valuable information. Set the write-protect switch
to write enabled (see page 26).
3. Press the unload button on the front of the tape
drive. Insert the data cartridge with the label side
up and the write-protect switch facing you.
December 1993 EXB-8500/EXB-8500c 21


