12
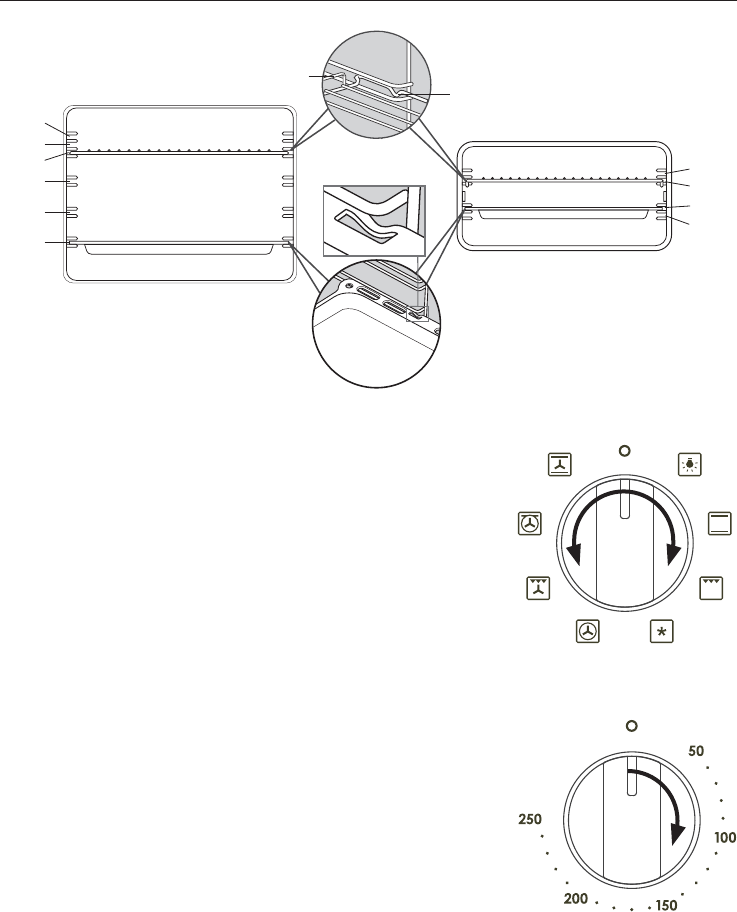
1 Slide in the shelves you will need, making sure that:
●
they are between the two wires of a shelf position or
on the sliding shelf supports
●
the stop notches point down
●
the guard rail is at the back.
●
Note: the grill tray should be positioned between
the two wires of a shelf position or on the
sliding shelf supports, and orientated as shown.
2 Select a function.
●
The oven light(s) will come on.
●
In single models, the function indicator light will
also come on.
3 Set the temperature.
●
The temperature indicator light will come on.
●
It will go out when the oven has reached the set
temperature.
During cooking
●
The temperature indicator light may come on and go out
again as the oven maintains the temperature.
●
A cooling fan may automatically come on at different times
and blow out warm air below the control panel.
It may continue to run even after the oven has
been turned off. This is normal.
●
Set the temperature back to off (O) before changing functions.
When you have finished cooking
Turn both the function and temperature
knobs to the off (O) position.
Fig. 11 Turning the function knob
(functions and knobs may vary)
Fig. 12 Turning the temperature knob
(knobs may vary)
Fig. 10 Positioning the shelves and
grill tray – full and compact ovens
Shelf positions
Guard rail
Stop notch
Stop notch
Shelf positions
4
1
2
3
4
6
5
2
1
3
USING YOUR OVEN


