


6-4
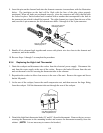
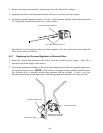
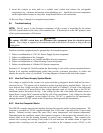
8. Insert the pins on the element leads into the element connector in accordance with the illustration
below. The insulation on the lead will be flush with the face of the plug when properly
positioned. When all leads are positioned correctly, close the connector and verify that the tabs
are locked in place. Each element lead is marked with a number that corresponds to the hole in
the connector into which it should be inserted. The right element (as viewed from the rear of the
unit) uses the 6-pin connector; the left element uses holes 1 through 6 of the 9-pin connector.
Lead 1
Lead 3
Note "D" pin and rib
indentifying Hole 1.
Note "D" pin and "pip"
indentifying Hole 1.
9. Bundle all six element leads together and secure with plastic wire ties close to the element and
connector, and in the middle.
10. Reverse Steps 1 through 3 to complete the procedure.
6.3.4 Replacing the High-Limit Thermostat
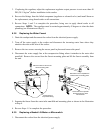
1. Drain the cookpot and disconnect the cooker from the electrical power supply. Disconnect the
unit from the water supply at the rear of the cooker. Remove the basket lift arms from the unit
and cut the metal wire ties securing the thermostat tube to the element.
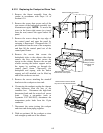
2. Reposition the cooker to allow clear access to the rear of the unit. Remove the upper and lower
basket lift panels.
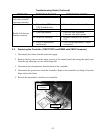
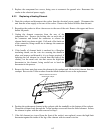
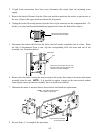
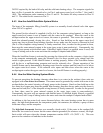
3. At the rear of the cookpot, loosen the small compression nut, and then unscrew the large fitting
from the cookpot. Pull the thermostat tube out through the rear of the cookpot.
Unscrew the large fitting
only after loosening the
small compression nut.
Loosen the small
compression nut first.
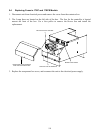
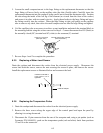
4. Detach the high-limit thermostat leads (5C and 8C) from the thermostat. Remove the two screws
securing the thermostat to the mounting bracket and remove the thermostat assembly from the
cabinet. (NOTE: It is not necessary to remove the bracket.)