


6-6
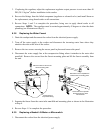
4. Remove the temperature probe by unscrewing it from the front of the cookpot.
5. Apply thread sealer to the replacement probe and screw it securely into the cookpot.
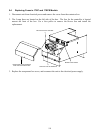
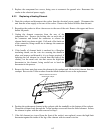
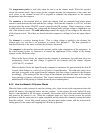
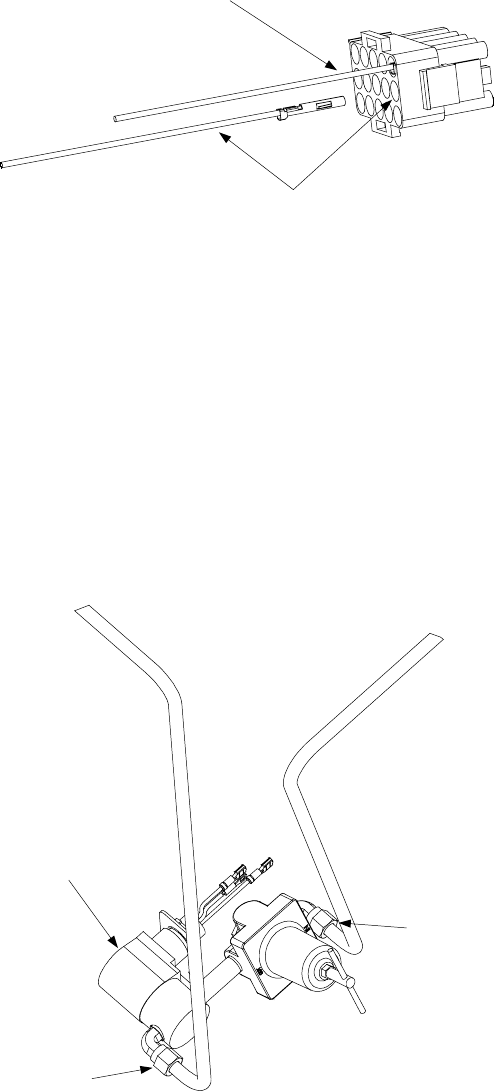
6. Insert the red probe lead into position 13 of the 15-pin connector and the white lead into position
14. Pull gently on each lead to ensure it is firmly seated.
Insert red lead into position 13.
Insert white lead into position 14.
7. Reattach the 15-pin connector to the rear of the computer, close the control panel, and replace the
three screws removed in Step 2.
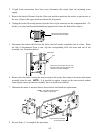
6.3.7 Replacing the Pressure Regulator or Solenoid Valve
1. Drain the cookpot and disconnect the cooker from the electrical power supply. Turn off or
disconnect the water supply to the cooker.
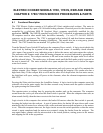
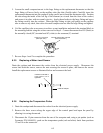
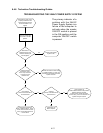
2. Loosen the compression fittings on the water lines running to and from the regulator and remove
the regulator from the unit. (NOTE: If the cooker is equipped with the optional Autofill feature,
the solenoid valve is installed between the regulator and the cookpot. If that is the case,
disconnect the solenoid leads and remove both the regulator and solenoid valve from the unit.)
Compression Fitting
Compression Fitting
Optional Solenoid Valve
Regulator must be rotated
to clear drain plumbing.