


6-7
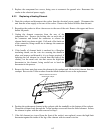
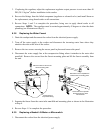
3. If replacing the regulator, adjust the replacement regulator output pressure to not more than 40
PSI (28.15 kg/cm
2
) before installation in the cooker.
4. Recover the fittings from the failed component (regulator or solenoid valve) and install them on
the replacement, using thread sealer on all connections.
5. Reverse Steps 1 and 2 to complete the procedure, being sure to apply thread sealer to all
connections. NOTE: The regulator must be rotated approximately 45 degrees to clear the drain
plumbing (see illustration at Step 2).
6.3.8 Replacing the Water Faucet
1. Drain the cookpot and disconnect the cooker from the electrical power supply.
2. Turn off the water supply to the cooker and disconnect the incoming water lines where they
attach to the stubs at the rear of the cooker.
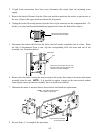
3. Remove the two screws securing the access panel in place and remove the panel.
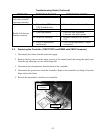
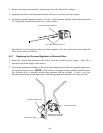
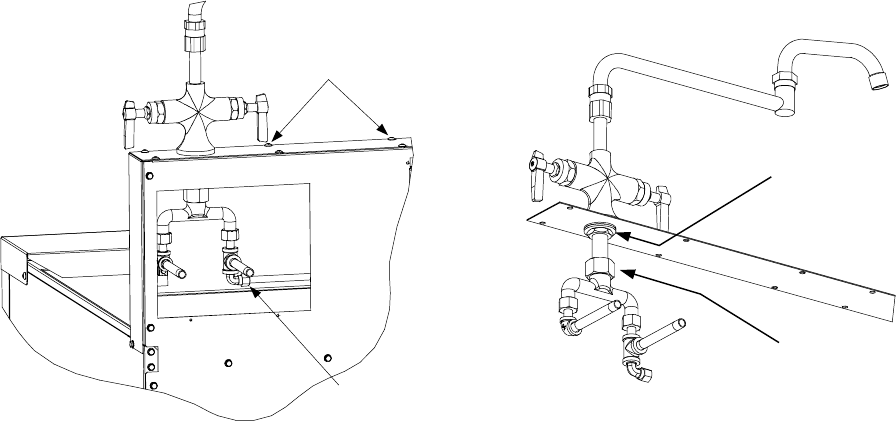
4. Disconnect the water supply line at the compression fitting where it attaches to the water inlet
manifold. Remove the screws from the faucet mounting plate and lift the faucet assembly from
the unit.
Disconnect this
compression fitting.
Remove screws to remove the
faucet mounting plate.
Loosen this nut to separate
the faucet from the water
inlet manifold.
Remove this nut to separate the
faucet from the mounting plate.
5. Separate the faucet from the water inlet manifold and mounting plate as shown in the illustration
at Step 4.
6. Reverse Steps 1-5 to complete the procedure.
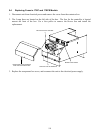
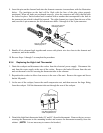
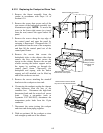
6.3.9 Replacing a Basket Lift Motor or Microswitch
1. Disconnect the cooker from the electrical power supply.