


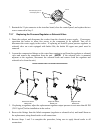
7-11
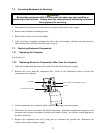
b. Unplug the 5- and 12-pin connectors from the interface board. Do not disconnect the water
level sensor leads from the interface board.
c. Remove the interface board bracket from the unit.
d. Using a pin pusher, push out the temperature probe leads from holes 6 and 8 on the 12-pin
connector.
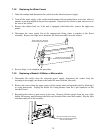
4. Disconnect the Autofill water supply piping at the cookpot compression fitting.
5. Remove the screws that secure the topcap to the cabinet and remove the topcap from the unit.
On double units, remove the cookpot connecting strip.
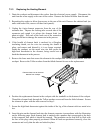
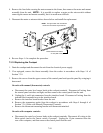
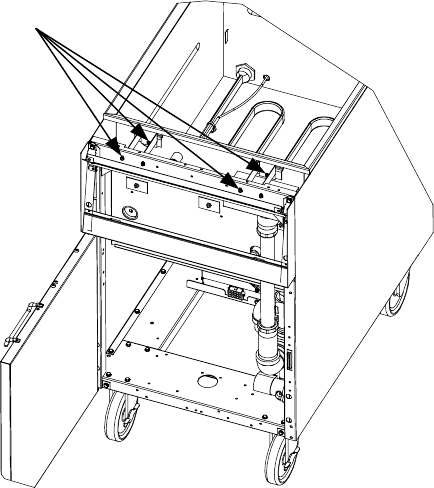
6. Remove the screws attaching the standoff brackets to the cookpot.
Remove these screws
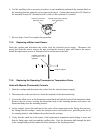
7. Unplug the element wiring harnesses from the rear of the contactor box. Disconnect the high-
limit thermostat leads from the thermostat body. Remove the screws securing the backsplash to
the cabinet and remove the backsplash.
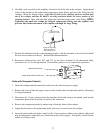
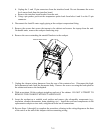
8. With an assistant, lift the cookpot straight up and out of the cabinet. DO NOT ATTEMPT TO
REMOVE THE COOKPOT WITHOUT ASSISTANCE!
9. Invert the cookpot on a suitable work surface and remove the salvageable components (e.g.,
insulation, element, thermostats, drain plumbing, etc.). Install the recovered components on the
replacement cookpot or rinse tank, using thread sealer on all connections.
10. Reverse Steps 1 through 8 to complete the procedure, referring to the wiring diagram on the door
of the unit or at the end of this chapter when reconnecting wiring.