


6-9
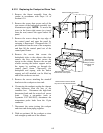
6.3.10 Replacing the Cookpot or Rinse Tank
1. Remove the faucet assembly from the
cooker in accordance with Steps 1-4 of
Section 6.3.8.
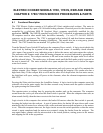
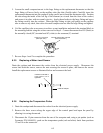
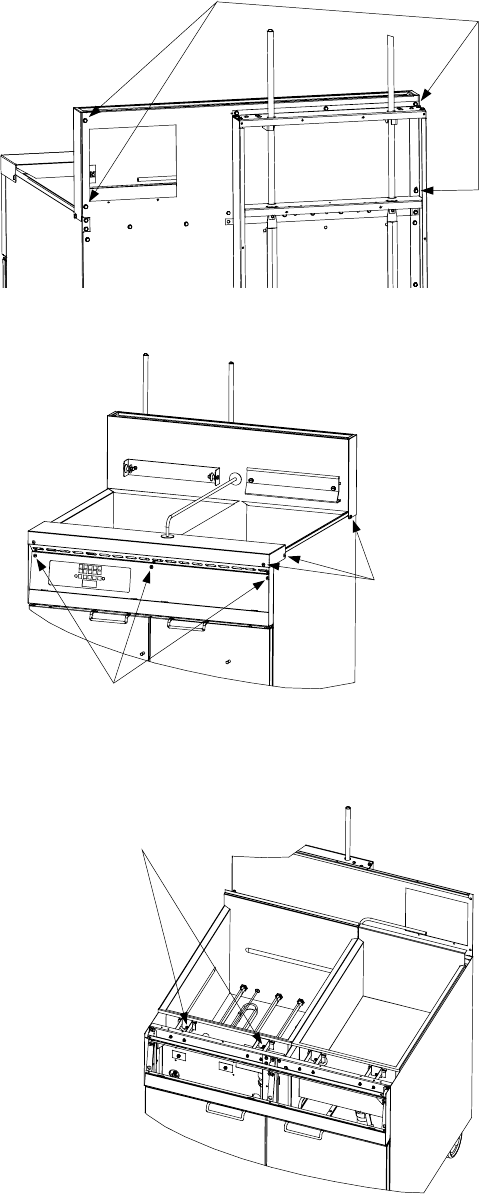
2. Remove the screws that secure each of the
rear corners of the backsplash assembly (see
illustration at right). NOTE: To access the
screw in the lower right corner (as viewed
from the rear) remove the upper basket lift
panel.
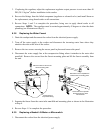
3. Remove the screws along the top edge of
the control panel and open the panel by
swinging it downward. Disconnect the 15-
pin connector from the rear of the computer,
and then lift the control panel out of the
control panel frame.
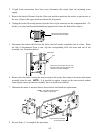
4. Remove the screws that secure the
backsplash sides to the cabinet sides then
remove the four screws that secure the
topcap to the cabinet. Remove the nut and
washer securing the basket support rod to
the topcap by reaching up through the
control panel frame. Conversely, the
backsplash and topcap, with the basket
support rod still attached, can be lifted up
and off the cooker as one unit.
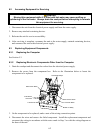
5. Remove the screws attaching the standoff
brackets to the cookpot or rinse tank.
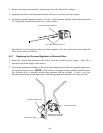
6. If removing the cookpot, unplug the element
wiring harnesses from the rear of the
contactor box. Disconnect the high-limit
thermostat leads and the water-level sensor
leads. Using a pin-pusher (such as
Frymaster P/N 806-4855), disconnect the
temperature probe leads from the 15-pin
connector.
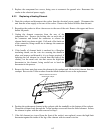
7. Disconnect the union joining the cookpot
and rinse tank drain piping together.
8. With an assistant, lift the cookpot or rinse
tank straight up and out of the cabinet.
Remove these four screws.
Remove these
screws (on both
sides) to remove
backsplash and
topcap.
Remove these screws to
dismount the control panel.
Remove these screws to release
the pots from the standoff brackets.