


7-8
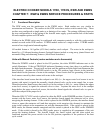
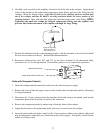
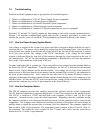
Note D-shaped pin and
rib identifying Hole 1.
Hole 6
Hole 8
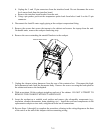
7. Reattach the 12-pin connector to the interface board, close the control panel, and replace the two
screws removed in Step 2.
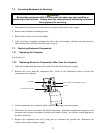
7.3.7 Replacing the Pressure Regulator or Solenoid Valve
1. Drain the cookpot and disconnect the cooker from the electrical power supply. If necessary,
reposition the cooker to allow free access to the component to be replaced. Turn off or
disconnect the water supply to the cooker. If replacing an Autofill system pressure regulator or
solenoid valve on a unit equipped with basket lifts, the basket lift upper rear panel must be
removed.
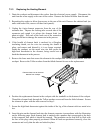
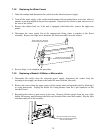
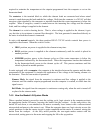
2. Loosen the compression fittings on the water lines running to and from the regulator or solenoid
valve and remove the component from the unit. (NOTE: If the solenoid valve is mounted
adjacent to the regulator, disconnect the solenoid leads and remove both the regulator and
solenoid valve from the unit.)
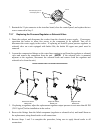
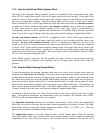
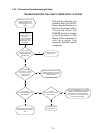
Double Unit without
Basket Lifts
Single Unit without
Basket Lifts
Single Unit with
Basket Lifts
TYPICAL WATER SUPPLY SYSTEM CONFIGURATIONS
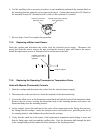
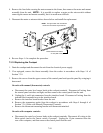
3. If replacing a regulator, adjust the replacement regulator output pressure to not more than 40 PSI
(28.15 kg/cm
2
) before installation in the cooker.
4. Recover the fittings from the failed component (regulator or solenoid valve) and install them on
the replacement, using thread sealer on all connections.
5. Reverse Steps 1 and 2 to complete the procedure, being sure to apply thread sealer to all
connections.