1-23
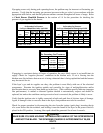
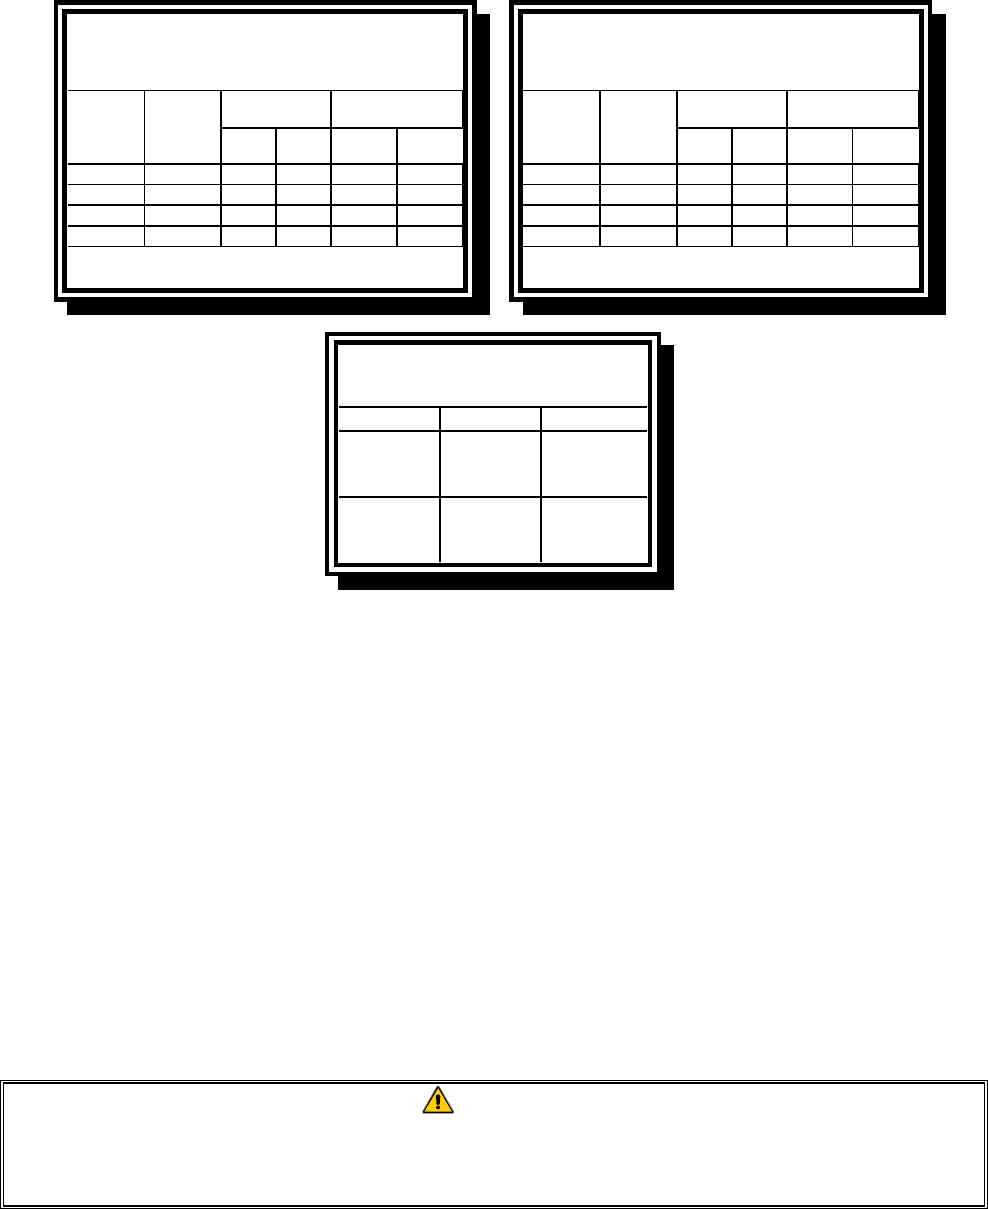
If popping occurs only during peak operating hours, the problem may be incorrect or fluctuating gas
pressure. Verify that the incoming gas pressure (pressure to the gas valve) is in accordance with the
appropriate table below, and that the pressure remains constant throughout all hours of usage. Refer
to Check Burner Manifold Pressure in the section of 1.4 for the procedure for checking the
pressure of gas supplied to the burner.
Orifice Diameter
Single
Vat
Dual
Vat
Single
Vat
Dual
Vat
G20 20 2 x 3.40 2 x 3.40 7 mbar 7 mbar
G25 20 or 25 2 x 3.40 2 x 3.40 10 mbar 10 mbar
G30 28/30 or 50 2 x 2.05 2 x 2.05 17 mbar 17 mbar
G31 37 or 50 2 x 2.05 2 x 2.05 20 mbar 20 mbar
CE Standard
for Incoming Gas Pressures
for Fryers Manufactured After April 1999
(1) mbar = 10,2 mm H
2
O
Gas
Pressure
(mbar)
(1)
Regulator Pressure
Orifice Diameter
Single
Vat
Dual
Vat
Single
Vat
Dual
Vat
G20 20 2 x 3.40 2 x 3.40 7 mbar 7 mbar
G25 20 or 25 2 x 3.40 2 x 3.40 10 mbar 9 mbar
G30 28/30 or 50 2 x 2.05 2 x 2.05 17 mbar 16,5 mbar
G31 37 or 50 2 x 2.05 2 x 2.05 20,2 mbar 18,5 mbar
CE Standard
for Incoming Gas Pressures
for Fryers Manufactured Through April 1999
(1) mbar = 10,2 mm H
2
O
Gas
Pressure
(mbar)
(1)
Regulator Pressure
Non-CE Standard
for Incoming Gas Pressures
Gas Minimum Maximum
Natural
6" W.C.
1.49 kPa
14.93 mbar
14" W.C.
3.48 kPa
34.84 mbar
LP
11" W.C.
2.74 kPa
27.37 mbar
14" W.C.
3.48 kPa
34.84 mbar
If popping is consistent during all hours of operation, the most likely cause is an insufficient air
supply. Check for “negative pressure” conditions in the kitchen area. If air is flowing into the
kitchen area, this indicates that more air is being exhausted than is being replenished and the burners
may be starved for air.
If the fryer’s gas and air supplies are okay, the problem is most likely with one of the electrical
components. Examine the ignition module and controller for signs of melting/distortion and/or
discoloration due to excessive heat build-up in the fryer. (This condition usually indicates improper
flue performance.) A melted or distorted ignition module is automatically suspect and should be
replaced, but unless the condition causing excessive heat is corrected, the problem is likely to recur.
Verify that the ignition wire is tightly connected at both ends and free of obvious signs of damage.
Again, if damage is due to excessive heat in the fryer, that problem must also be corrected.
Check for proper operation by disconnecting the wire from the ignitor (spark plug), inserting the tip
of a screw driver into the terminal, and holding it near the frame of the fryer as the power switch is
placed in the ON position. A strong, blue spark should be generated for at least 4 seconds.
DANGER
MAKE SURE YOU ARE HOLDING THE INSULATED HANDLE OF THE SCREWDRIVER
AND NOT THE BLADE. THE SPARKING CHARGE IS APPROXIMATELY 25,000
VOLTS.


