


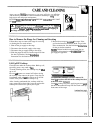

Proper care and
cleming
are important so your range will give you efficient
and satisfactory service. F
O
11
OW
these directions carefully in
ctig
for it to
help assure safe and proper maintenance.
BE SURE
ELEC~C
PO~R
IS
0~
BEFORE
CLEMG
ANY PART
OF
T~
RANGE.
m
P
,4
A
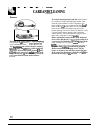
Myour range is removed for
cl-g,
servicing or any mmon,
be sure anti-tip device is
re-engaged
properly when the range
is replaced.
Fdure
to
tie
tti
pre~ution
codd
resdt
in tipping of
M
A
the range and cause injury.
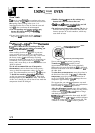
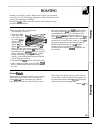
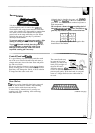
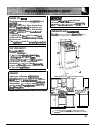
How to Remove the Range for Cleaning and Servicing
Follow these steps to remove the range for servicing
5. Reverse these steps to
re-instil
the range. If the
or cleaning hard to reach surfaces.
gas line has been disconnected, check for gas leaks
1. Shut off the gas supply to the range.
after reconnection. See the Initiation kstructions
2. Disconnect the electrical supply to the range.
for the gas lead test method.
3. Disconnect the gas supply tubing to the range.
NO~:
A trained technician should make the gas
installation, disconnection and
re-connection
of the
4. Slide the range forward to free the range foot from gas supply the appliance.
the Anti-Tip bracket. See the
kstilation
Instructions for the location of the bracket.
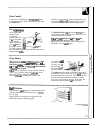
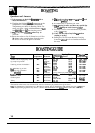
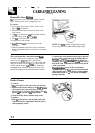
Lift-Up/Off Cooktop
Clean the area under the cooktop often. Built-up soil,
especially grease, may catch on
fwe.
To make cleaning easier, the cooktop may be Mted
up or off.
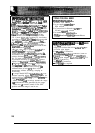
Be sure
M
burners are turned off before raising
the cooktop. Then remove the grates. Grasp the two
front burner wells and
hft the cooktop up or off. Be
careful of the pilots when the cooktop is up.
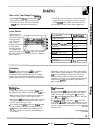
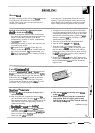
After cleaning underneath the cooktop with hot,
soapy water and a clean cloth, lower or replace the
cooktop. Be careful not to pinch your fingers.
To replace the cooktop if you have removed it,
insert
tie
two tabs at the back of the cooktop into slots
at the base of the
backguard.
Lower
the
cooktop into place, applying pressure
until
the tab on the underside snaps into the catch at the top
front center of the range.
19