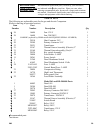
Temperatures can be programmed from 1’70 to 390 degrees F. If you try to go beyond these limits, the buzzer will sound and the display will
blank, then go to 170 or 390.
0 Alarms and pressures can be turned on or off using any change switch. The display will show “on” or “off”.
Four times affect the whole cook cycle. There are:
* LOAD COMP: This is load compensation. Set from 1 to 10. 0 is no load compensation, 10 is full load compensation.
LOAD ANT: This is load anticipation. Set from 0 to 10. 0 is no anticipation, 10 is full anticipation.
PC FACTOR: This is the proportional control factor. Set from 0 to 30. 0 is no proportional control (best recovery time), 30 is full proportional control
8’ (best temperature regulation).
FIL CYCLE: This is the number of filter cycles. Set to the number of loads to cook this product before filtering.
5. You can push SELECT PRODUCT whenever you are done with a product. This will take you to the next product.
amming
elt
1.
2.
tm
3.
Put keyswitch in “Program” position. Push SELECT PRODUCT until red Melt light turns on. Push SELECT FUNCTION to set the melt temperature
or 1st cycle.
When the melt temperature is displayed, an “A” in the display means that auto melt is turned on. Example: if the melt temperature is 200 and
auto melt is on, the display will show “A200”. If auto melt is off, the display will show “200”. Push the change switch under the “A” to turn it on or off.
If auto melt is on, the control will pulse the heating elements until the pot temperature reaches the melt temperature, then automatically select
the 1st cycle.
The 1st Cycle is the product the control will select on power-up. Products are numbered from 1 to 10; the upper left product is 1, the product below
that is 2, etc. Set with change switches.
m
rogramming Idle
1. Put keyswitch in “Program” position. Push SELECT PRODUCT until red Idle light turns on. Push SELECT FUNCTION to set the idle clock
time or the idle temperature.
* 2. When the idle time is shown, the first digit indicates that auto idle is on with an “A”.
Push the change switch under the “A” to turn it on or off.
The idle time is shown in minutes. It is set from 0 to 255. If auto idle is off, the idle time is irrelevant.
3. When the idle temp is shown, the type of auto idle is shown with a “C” or a “T” in the first digit. “C” means cycle idle, “T” means times idle.
n
Cycle idle starts the idle clock each time a new product is selected. Timer idle starts the idle clock at the end of each load cooked. Idle is entered
automatically when the idle clock times out.
To See The
oduct Usage
r
1. With keyswitch in PROGRAM position, push REVIEW USAGE switch. Push SELECT PRODUCT to see the number of loads of each product cooked.
All product lights turn on when the total count of all products is shown.
2. Push RESET USAGE switch to set a count to zero. Pushing RESET USAGE when all LED’s are lit will set the total count and all individual counts
to zero. Pushing RESET USAGE when only one product LED is lit will reset only that count, not the grand total.
* 3. Push REVIEW USAGE when done to return to programming.
The maximum product cycle count is 255. The grand total count maximum is 9,999. If a count reaches the maximum without being reset, it will remain
at the maximum until you reset it.
ro~amming Notes
The change switches, SELECT PRODUCT and SELECT TIME will auto-repeat when held down: SELECT FUNCTION does not.
You cannot turn the alarm on in the first time of a cook cycle.
Pushing SELECT TIME when the LOAD COMP, LOAD ANT, PC FACTOR, or FIL CYCLE lights are on will not take you to the next interval
time in a product, because these items can only be set in the first interval time.
m~o~ant Note
After programming a product (or melt or idle), you should review all settings for all times. Verify that you have deleted any times that you do not
want, and that all settings are programmed as required.


