


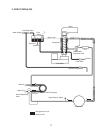
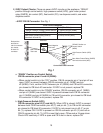
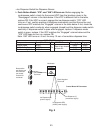
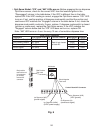
18
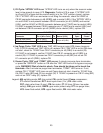
C. Control Board Check
Before replacing a CB that does not show a visible defect and that you suspect is bad,
always conduct the following check procedure. This procedure will help you verify your
diagnosis. Before proceeding, check for proper voltage per appliance nameplate. Check
that the 24VAC 1A fuse and 115VAC 3A GM fuse are good.
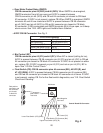
• Check the S1 dip switch settings to assure that they are in the factory default position.
For factory default settings, see "III.C.1. Default Dip Switch Settings." S1 dip switch
7determines bin control application. WARNING! Do not adjust S1 dip switch 7 out
of the factory default position. This dip switch must be left in the factory default
position or the appliance will not operate correctly.
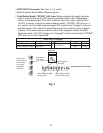
• When checking for 115VAC high-voltage (primary), always choose a 115VAC neutral
(W) to establish a good neutral connection.
• When checking for 24VAC low-voltage (secondary), always choose a 24VAC neutral
(LBU) to establish a good neutral connection. If the appliance is in alarm, see "III.B.
LED Lights and Audible Alarm Safeties."
• When checking for 5VDC, use CBred K4 connector pin closest to CB black
K3connector for DC ground (GND).
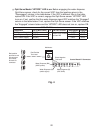
1) Startup-"POWER OK" LED on: Move control switch to "ICE" position, then move
power switch to "ON" position. "POWER OK" LED turns on. "POWER" LED remains
on unless power supply is interrupted. NOTICE!Appliance will not start unless the
safety switch is engaged. Diagnosis: Checkthat "POWER OK" LED is on. If not,
check for proper 115VAC supply voltage to CT (main breaker or fuse and power switch).
Next, check for proper 24VAC output from CT. Next, check that 1A fuse is good. Check
for 24VAC from CB K8connector pin #1 (W/R) to CB K8 connector pin #2(LBU).
If24VAC is present and "POWER OK" LED is off, replace CB.