


The Installation, page 2 of 5
5. Connecting the Tank to the Dispenser Faucet
Product Damage. Make sure bends in all copper tubing are
smooth and unkinked, with no pinching, twisting, or blockage
before you proceed. Pinched or blocked water lines may cause damage to the
dispenser tank. Do not extend the copper lines further than the 16" provided.
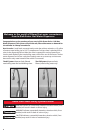
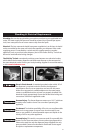
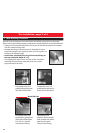
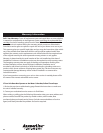
Push the 1/4" semi-rigid polyethylene tube all the way to the mechanical stop
(approx. 1/2") into the quick-connect fitting (Fig. 1). Slip the clear vinyl tube over
the middle fitting and slide it down the stem past both of it’s molded barbs,
approximately 1/2" (Fig. 2). Slip the flexible opaque silicone tube over the larger
outlet fitting and slide it down the stem past both of it’s molded barbs,
approximately 1/2". (Fig. 3).
DO NOT PLUG THE TANK UNIT IN.
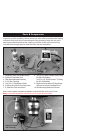
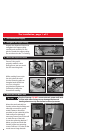
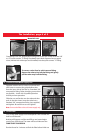
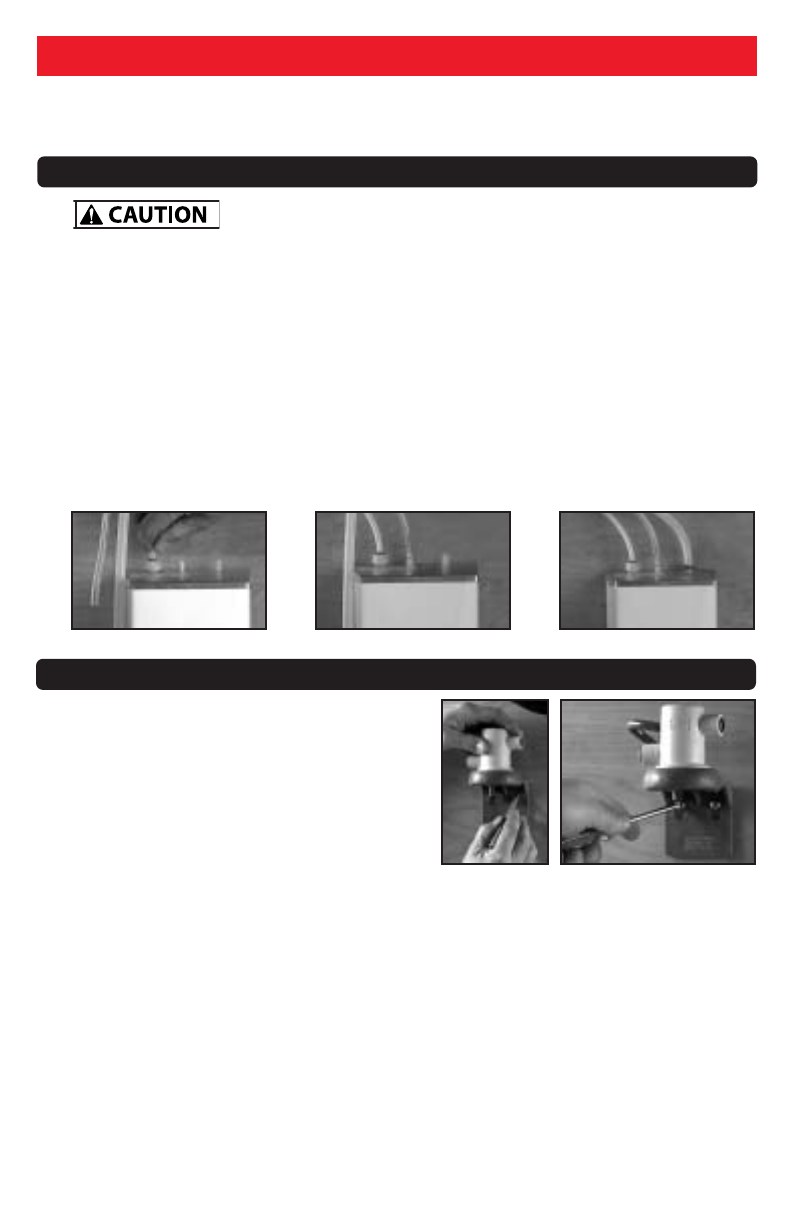
6. Mount the Head & Filter Bracket
Install the head and bracket assembly so
that all plumbing connections can be made
without stretching, kinking, or pinching the
3/8" polyethylene tubes.The tubes can be
cut to make installation easier.Make sure
the mounting location allows for the filter
cartridge to be removed and replaced.
With a pencil, mark the mounting hole locations. Pre-drilling pilot holes (1/8”) may
be required.
Attach the mounting bracket using the screws provided. (Screws
provided are designed for mounting into hardwood or studs. It may be necessary to
use appropriate anchors when mounting to thin surfaces or drywall.
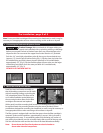
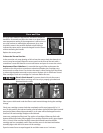
The filter system is equipped with vent line that opens when the filter cartridge is
removed. Under normal conditions, approximately 2 ounces (~60 cc) of water is
discharged from the vent. To conveniently redirect this discharge, a 6” section of
gray tubing is provided.If you wish to install, simply slide one end of the gray tube
over the vent and the other end into the hole on the head & bracket assembly.
Note: Do not locate the filter directly above an electrical outlet or
above other electrical components.
Note: Screws provided are designed for mounting into hardwood or studs. It may be
necessary to use appropriate anchors when mounting to thin surfaces or drywall.
9
1. 2. 3.