20
Self-Cleaning
ADJUSTING THE OVEN TEMPERATURE
Your oven control has been precisely set at the factory. This setting may dier from your previous oven however, so your
recipe times may not give you the results you expect. If you think that the oven is cooking too hot or too cool for your recipe
times, you can adjust the control so that the oven cooks hotter or cooler than the temperature displayed.
1. Press
.
2. Set the temperature to 550°F (287°C) by pressing and holding the
.
3. Within 2 seconds, press and hold
until the 2 digit display appears. Release . The display now indicates the
amount of degrees oset between the original factory temperature setting and the current temperature setting. If the
oven control has the original factory calibration, the display will read "0."
4. The temperature can now be adjusted up or down 35°F or 19°C, in 5°F or 1°C steps by pressing and holding the
or
. Adjust until the desired amount of oset appears in the display. When lowering the oven temperature, a minus sign
(-) will appear before the number to indicate that the oven will be cooler by the displayed amount of degrees.
5. When you have made the desired adjustment, press
to go back to the time of day display.
Oven temperature adjustments made will not change the Self-Cleaning feature temperature.
SELF-CLEAN TIME LENGTH
For satisfactory results, use a 2 hour Self-Clean cycle for light soils and a 3 hour cycle for average or a 4 hour cycle for
The kitchen area should be well ventilated using an open window, ventilation fan or exhaust hood during
the Self-Clean cycle. This will help eliminate the normal odors associated with the Self-Clean cycle.
( If you do not want to start a Delayed Self-Clean Cycle, skips steps 2 & 3.)
1. Be sure the clock shows the correct time of day.
2. Press
. The “ “ in the time of day will ash.
3. Press and hold the
pad to scroll to the time to start the delayed Self-Clean cycle. Release the pad when the desired
time is displayed.
4. Press
. “— — —” appears in the display.
5. Press the
or once. “3:00” appears in the display for a 3 hour cycle. To change to a 2 hour cycle press . “2:00”
appears in the display or to select a 4 hour cycle press
. “4:00” appears in the display.
As soon as the controls are set, the motor driven lock will begin to close automatically and the “DOOR LOCK” indicator
light will ash. DO NOT open the oven door while the light is ashing (it takes about 15 seconds for the oven door to
lock).
6. “CLn” will appear in the display during the Self-Clean cycle and the “DOOR LOCK” light will glow until the Self-
Cleaning cycle is complete or cancelled and the oven temperature has cooled.
1. The time of day or “End” will appear in the display window and the “Clean” and “DOOR LOCK” light will continue to
glow.
2. Once the oven has cooled down for about 1 HOUR and the “DOOR LOCK” light has gone out, the oven door can be
opened.
3. If “End” is in the display and the Select Clean indicator light remains ON, press
. The time of day will appear in the
display.
When the oven is cool, wipe away any residue or powdered ash with a damp cloth or paper towel.
If it becomes necessary to stop or interrupt a Self-Cleaning cycle:
1. Press
.
2. Once the oven has cooled down for about 1 HOUR and the “DOOR LOCK” light has gone out, the oven door can be
opened.
3. Restart the Self-Clean cycle once all conditions have been corrected.
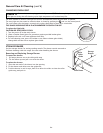
To avoid possible burns use care when opening the oven door after the Self-Cleaning cycle. Stand to the side
of the oven when opening the door to allow hot air or steam to escape.
DO NOT force the oven door open. This can damage the automatic door locking system. Use caution and
avoid possible burns when opening the door after the Self-Cleaning cycle has completed. The oven may still be VERY HOT.


