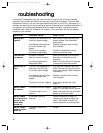
Troubleshooting
PROBLEM
Nothing will
operate
The oven will
not operate
Burner fails to
light
Burner flames
are uneven
Burner flames
lift off ports, are
yellow, or are
noisy when
turned off.
Burner makes
popping noises
when on
This section is designed to help you save the cost of a service call. It outlines possible
problems, their causes, and actions you can take to solve each problem. If you still need
assistance or service, call our Consumer Assistance Center (in the U.S.A., see page 33; in
Canada, see page 34) for help or calling for service. Please provide a detailed description of
the problem, your appliance’s complete model and serial numbers, and the purchase or
installation date. (See the “A Note to You” section.) This information will help us respond
properly to your request.
POSSIBLE CAUSE
The unit is not wired into a live
circuit with proper voltage.
A household fuse has blown
or a circuit breaker has
tripped.
The unit is not properly
connected to gas supply.
You have not set the
electronic control correctly.
You have programmed a
delayed start time.
The unit is not plugged in or
wired into a live circuit or
circuit with proper voltage.
A household fuse has blown
or a circuit breaker has
tripped.
The burner ports are clogged.
The burner ports are clogged.
The burner cap is not in
position.
The air/gas mixture is
incorrect.
The burner is wet from
washing.
WHAT TO DO
Wire the unit into a live circuit with
proper voltage. (See Installation
Instructions.)
Replace household fuse or reset
circuit breaker.
Contact a designated servicing
outlet to reconnect range.
Refer to the section in this manual
describing the function you are
operating.
Wait for the start time to be reached
or cancel and reset the controls.
Plug unit into a properly grounded
outlet. Wire the unit into a live circuit
with proper voltage. (See installation
instructions.)
Replace household fuse or reset
circuit breaker.
Clean with a straight pin. (See
page 11.)
Clean with a straight pin. (See
page 11.) If this fails, call for service.
Make sure the burner cap is properly
seated on the burner head.
Follow instructions on page 12,
“Adjusting the height of top burner
flame.” If this does not work, call
service technician to check mixture.
Let dry.
30
4452761Av04c52 1/11/00 8:18 AM Page 30


