


17
CONNECTING THE WATER LINES (CONT.)
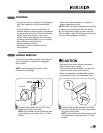
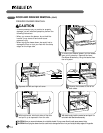
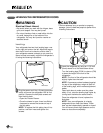
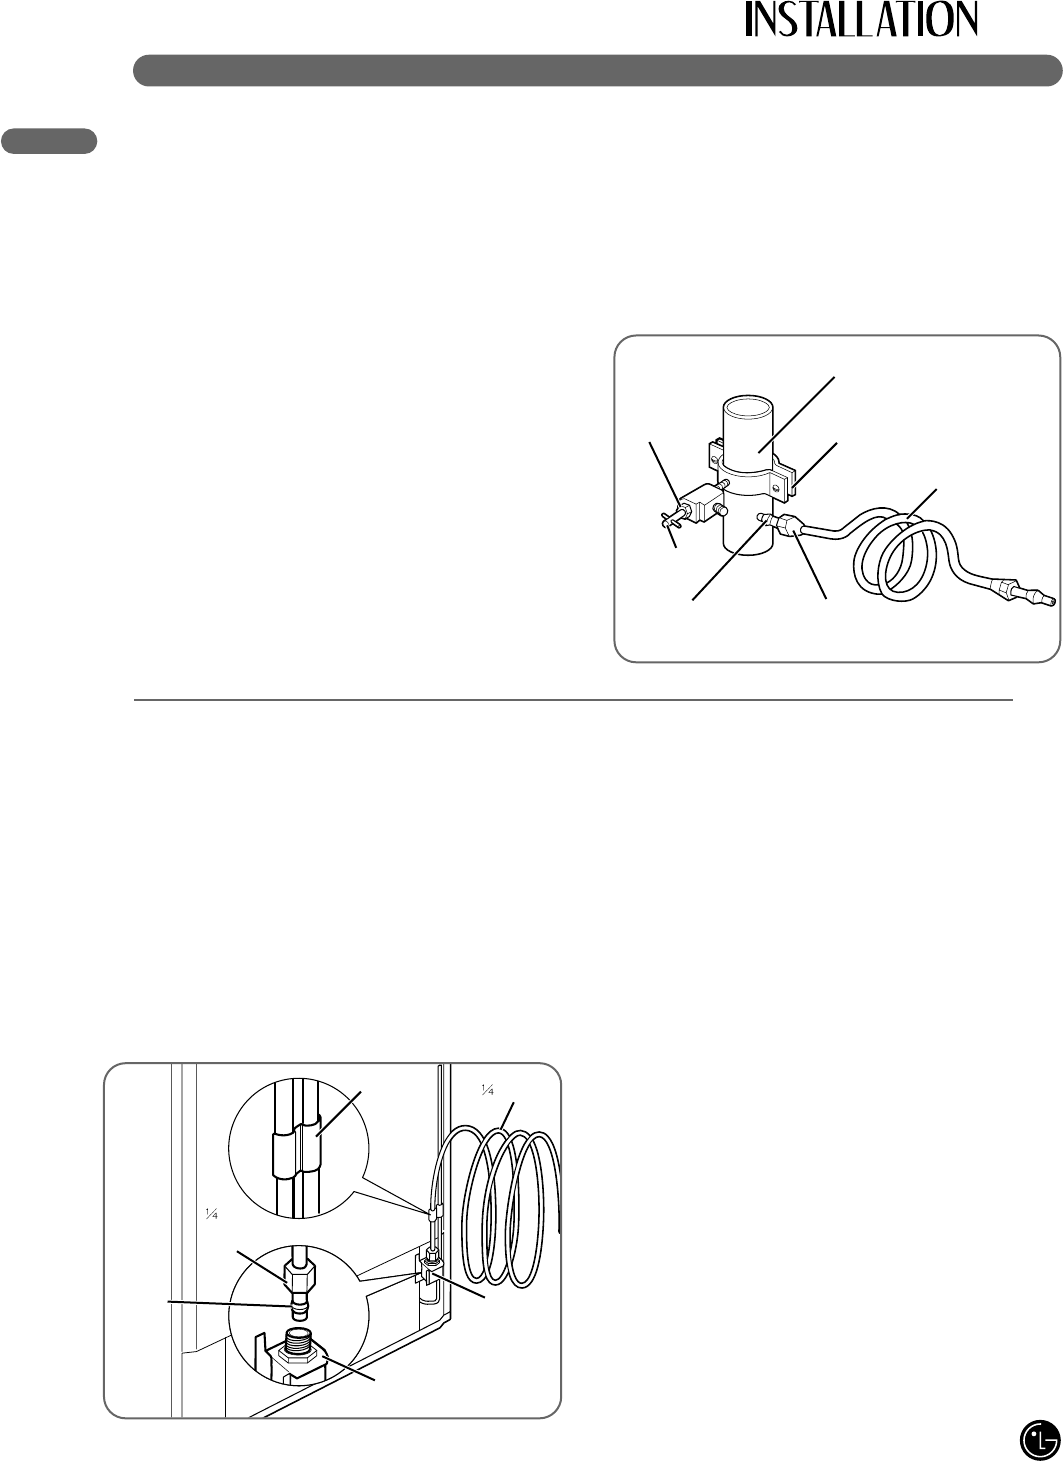
• Fasten the shutoff valve to the cold water pipe
with the pipe clamp. Be sure the outlet end is
solidly in the 1/4-in. drilled hole in the water
pipe and the washer is under the pipe clamp.
Tighten the packing nut. Tighten the pipe clamp
screws carefully and evenly so the washer
makes a watertight seal. Do not overtighten or
you may crush the copper tubing, especially if
soft (coiled) copper tubing is used. Now you are
ready to connect the copper tubing.
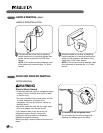
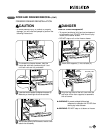
• Slip the compression sleeve and the
compression nut onto the copper tubing as
shown. Insert the end of the tubing into the
outlet end squarely as far as it will go. Screw
the compression nut onto the outlet end with a
wrench. A flare nut wrench works best, but an
open-end wrench will suffice. Do not
overtighten.
• Place the free end of the tubing into a container
or sink, and turn on the main water supply.
Flush out the tubing until the water is clear.
Turn off the shutoff valve on the water pipe.
Coil the copper tubing as shown below.
IMPORTANT: Before connecting the tubing to
the refrigerator, be sure the refrigerator power
cord is not plugged into the wall outlet.
If your refrigerator does not have a built-in water
filter, we recommend installing an external in-line
water filter. If your water supply contains sand or
particles, that sediment could clog the screen of
the refrigerator’s water valve. Install the filter in
the water line near the refrigerator.
NOTE: If your refrigerator is equipped with an
internal water filter, an external in-line water filter
should not be used.
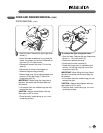
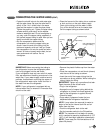
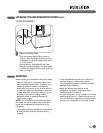
• Remove the plastic flexible cap from the water
valve.
• Place the compression nut and ferrule (sleeve)
onto the end of the tubing as shown.
• Insert the end of the copper tubing into the
connection as far as possible. While holding the
tubing, tighten the fitting.
IMPORTANT: Tighten any connections that leak.
Open the water at the shutoff valve.
• Plug in the refrigerator.
• Arrange the coil of copper tubing behind the
refrigerator so it does not vibrate against the
back of the refrigerator or against the wall.
• Check for leaks.
• Purge about 6 glasses of water that are
dispensed after refrigerator installation.
NOTE: It may take a few seconds for water to
begin to flow as the internal tank fills and air
clears from the lines.
• Push the refrigerator back to the wall.
• Set the icemaker switch to the ON position.
NOTE: The icemaker will not begin to operate
until it reaches its operating temperature of 15°F
(-9°C). It will then begin operation automatically.
NOTE: Throw away the first few batches of ice
(about 20 pieces).
Compression
Nut
Cold Water Pipe
Compression
Sleeve
Packing
Nut
Shutoff
Valve
Pipe Clamp
Coil of Polyethyleng
or Copper Tubing
Tubing
Clamp
Water
valve
Ferrule
(Sleeve)
Refrigerator
Connection
″
Compression
Nut
″ Tubing