


Installation
17
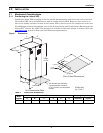
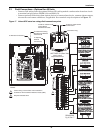
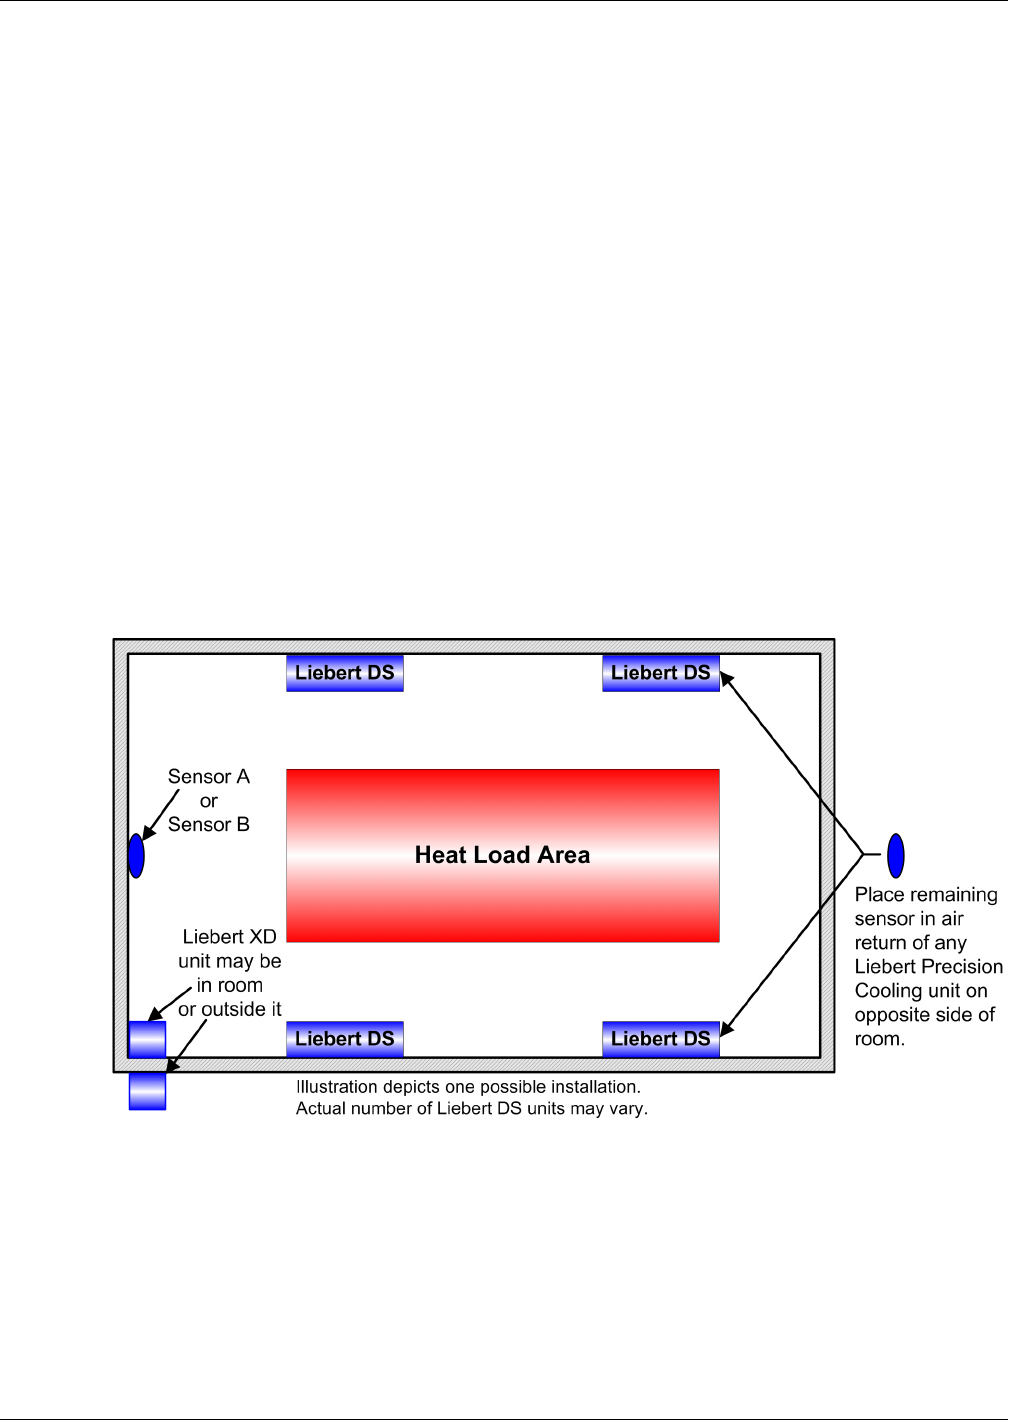
2.4 Remote Sensor Installation—Proper Placement
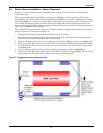
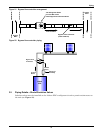
Placement of the two remote temperature/humidity sensors is critical to effective cooling of the
conditioned space.
The remote sensors must be installed in areas where conditions are representative of the space
conditioned by the Liebert XDP. Emerson recommends installing the sensors in different areas near
the cooling modules served by the Liebert XDP. If the return air side of the primary air mover, such
as a Liebert DS, represents the conditions where the Liebert XD cooling modules are located, one
sensor could be placed there. Emerson suggests placing the other sensor on the wall opposite the heat
load area (see
Figure 18 for guidance).
Do not install the sensors where ambient air might cause false readings, for example, near unsealed
doors or windows, or areas with stagnant air.
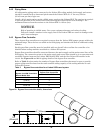
1. Unpack the two remote temperature/humidity sensors and cables.
One sensor is labeled Sensor A and the other Sensor B. The sensor cables are interchangeable;
each bears labels indicating Sensor End and Unit End.
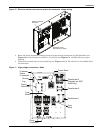
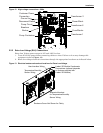
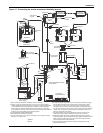
2. Connect the Sensor End of one of the supplied sensor cables to P66 on Sensor A (see Figure 14).
3. Connect the Unit End of the sensor cable to P67 on the Liebert iCOM input/output board inside
the Liebert XDP. Secure the ring terminal on the cable shield to the electric box adjacent to P67
(see
Figure 14).
4. Connect the Sensor End of the second sensor cable to P66 on Sensor B (see Figure 14).
5. Connect the Unit End of the cable to P67 on the Liebert iCOM display (see Figure 14). Secure the
ring terminal on the cable shield to the grounding screw adjacent to P67.
Figure 18 Suggested remote sensor placement