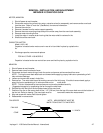
RELAY, DPST
1. Shut off power at main breaker.
2. Remove conveyor.
3. Remove control compartment covers.
4. Remove leads from relay and mark for reassembly.
5. Remove mounting screws and lift out relay.
6. Reassemble in reverse order.
TIME DELAY, 20 MINUTE
1. Shut off power at main breaker.
2. Remove conveyor.
3. Remove front control compartment cover.
4. Unplug all wires and mark for replacement.
5. Remove center mounting screw.
6. Reassemble in reverse order.
NOTE: Do not overtighten the mounting screw as this may damage the internal potted
electronic components.
COOLING FAN
1. Shut off power at main breaker.
2. Remove conveyor.
3. Remove front control compartment cover.
4. Remove 4 screws from fan frame.
5. Remove fan and unplug female cord receptacle.
6. Reassemble in reverse order.
NOTE: All current models have 2 of these cooling fans.
7. The second cooling fan is located in the rear of the rear control compartment. On older models of the
1116,1117,1152 through 1158 the fan was attached to a metal box on rear of oven. Metal box was removed
first. Newer ovens have fan mounted on inside of oven back and are removed from inside.
THERMOSTAT, COOL DOWN
Model 1100-1106 only
1. Shut off power at main breaker.
2. Remove conveyor.
3. Remove control compartment covers.
4. Remove 2 screws from holding bracket located in upper rear of the control compartment.
5. Remove the 2 leads and remove thermostat.
6. Reassemble in reverse order.
RELAY, DPST
1. Shut off power at main breaker.
2. Remove conveyor.
3. Remove front control compartment cover.
4. Remove leads and mark for reassembly.
5. Loosen mounting screws and remove.
6. Reassemble in reverse order.
THERMOSHETAT, COOLING FAN
1. Shut off power at main breaker.
2. Remove conveyor.
3. Remove front control compartment cover.
4. Remove lead wires and mark for reassembly.
5. Remove 2 screws and remove thermostat.
6. Reassemble in reverse order.
Impinger II - 1100 Series Service Manual - International48


