


© 2007 by Stephen Beck V1.0 Page 14 of 19 Use at your Own Risk
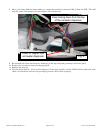
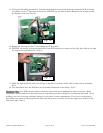
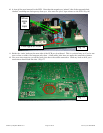
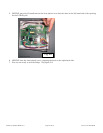
13. Clean the PCB with the Q-Tips and rubbing alcohol. This removes the residue that came out of the solder
when you heated it. Check to be sure that you don’t have any solder blobs bridging the gap between the
brown sections of the board. If you do, re-melt the solder and remove the bridge using the de-soldering bulb.
You should be able to see a clear green line between the positive and negative sides of each cap you soldered.
(Fig 18)
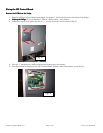
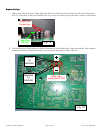
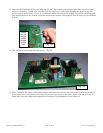
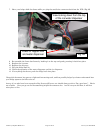
14. The completed board looks like this on top. (Fig 19)
15. Well, if all looks the same on the solder side as when you first started, and you haven’t had to reach for the
burn cream, give yourself and your helper (if you have one) a pat on the back. You’re well on your way to
being able to get the fridge back together and cooling off a refreshment of your choice. ☺
© 2007 Stephen Beck
Fig. 19
Fig. 18
© 2007 Stephen Beck
Check
for, and
remove
solder
bridges
across
here