Bulletin Number Chapter 4: Operation 56 of 102
Weigh Hopper Dump Cycle
The dump cycle allows the weigh hopper dump valve to cycle, or open and close, a number
of times prior to commencing with the next batch cycle. The setting allows from 1 to 9 dump
cycles between batches (open and closed cycles).
The normal and default factory setting is 1, meaning the weigh hopper dump valve will open
at the end of the weighed batch and close after the batch is discharged into the mixer.
Setting the dump cycle to more than one cycle may be useful when blending high static, dusty
material or those that have sticky tendencies. This will cycle the dump valve open and closed
to allow any material that may cling to the dump valve.
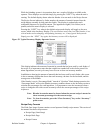
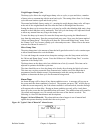
To enter the dump cycle menu, first enter the Setup menu by pressing the Manufacturer’s
icon from the main menu. Enter the password and press enter. Next, press the button marked
“Mixer and Dump Setup”. The display will show the “Mixer and Dump Setup” menu. Press
the “Dump Cycle” key to enter a dump cycle value and press enter. Please refer to the menu
structure tree shown in section 3-5.
Mixer Dump Time
The mixer dump time is the amount of time the knife gate below mixer’s valve remains open
to allow blended material to exit the blender.
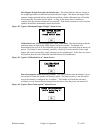
To view and change the current mixer dump time settings, enter the Setup menu and select
the “Mixer and Dump Setup” screen. Press the field next to “Mixer Dump Time” to set the
operation of the Dump Valve.
The dump timer on the dump valve has a default time of six (6) seconds. This time can be
adjusted to optimize the blender cycle time.
The timer should be set to close the dump valve shortly after clearing the high-level sensor.
This time can vary due to material flow characteristics, and the size of the batch that is
programmed into the blender control. Experimentation with this setting can allow the
operator to determine the best cycle for the material being mixed.
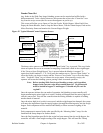
Alarm Flags
An alarm message will be shown if any alarm condition occurs. A message will pop up on
the screen until the alarm condition is resolved. The operator can press “OK” on this pop-up
to hide the screen temporarily, but if the alarm condition is still unresolved, then the message
will reappear after a short delay. During an alarm condition, not only will a visual alarm
show up on the screen but also an audible alarm will sound. The audible alarm will sound for
10 seconds and reappear every 30 seconds until the cause of the alarm is resolved. The
following is a list of all alarm names and descriptions:
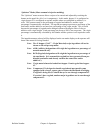
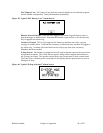
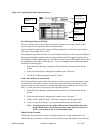
Hopper 1-6 Out of Material: This alarm indicates that a hopper is out of material and
signals the operator that they should check the resin system.
Figure 41: Typical “Out of Material” Alarm Screen


