Instructions for the user
12
4. ELECTRONIC ANALOG CLOCK
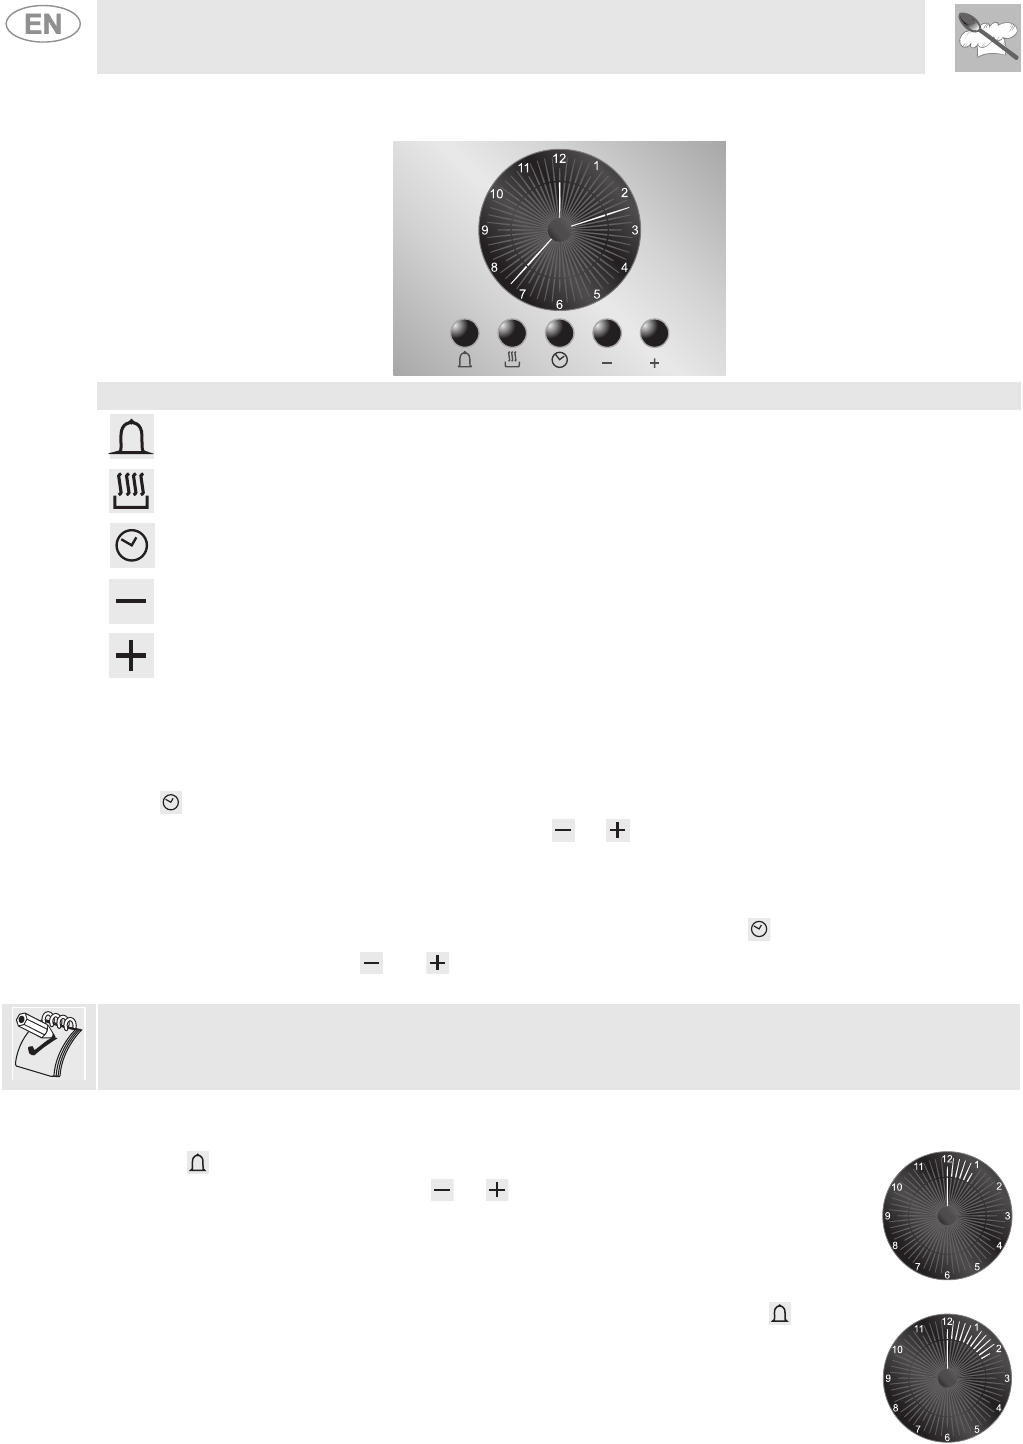
LIST OF BUTTON FUNCTIONS
TIMER BUTTON
END OF COOKING BUTTON
CLOCK ADJUSTMENT AND RESET
VALUE DECREASE BUTTON
VALUE INCREASE BUTTON
4.0.1 Setting the time
When the oven is used for the first time, or after an interruption in the electrical power supply, the display
flashes at regular intervals.
Press for 1 to 2 seconds to stop the display from flashing and to start the procedure for setting the
correct time. Press the value modification buttons or to increase or decrease the setting by one
minute.
Press one of the two value modification buttons until the current time appears. 6 to 7 seconds after the
last button is pressed, the clock will start at the set time.
When the oven is in standby mode, to modify the time simply press the button for about 2 seconds
and adjust the time using the and buttons. A few seconds after the last button is pressed, the clock
will restart normal operation.
At the end of each programmed operation 8 beeps will sound 3 to 4 times at intervals of about 1 and a
half minutes. The beeps can be hushed at any time by pushing any button.
4.0.2 Timer
The timer does not stop cooking; it simply activates the buzzer.
• Press and the clock dial display will light up as shown in figure 1;
• Within 6 to 7 seconds, press the or buttons to set the timer. Each time a
button is pressed, 1 outer mark on the clock dial, representing 1 minute of cooking
time, will light up or go out. (Figure 2 shows a cooking time of 10 minutes).
• The countdown will start 6 to 7 seconds after the last button is pressed; when the
programmed time has elapsed, the buzzer will sound.
• During the countdown, the current time can be viewed by pressing the button
once; press it again to return to the timer display.
• At the end of the countdown, the oven must be turned off manually by turning both
the thermostat knob and function selector knob to 0.
• The maximum cooking time that can be set is 60 minutes.
1)
2)


