


19
Operation (Continued)
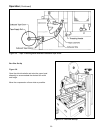
Tape Loading/Threading – Upper Taping Head
See Section II
Tape Loading/Threading – Lower Taping Head
With Tape Drum On Taping Head
See Section II
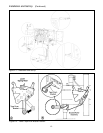
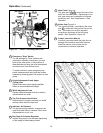
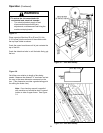
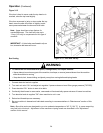
Tape Loading/Threading – Lower Taping Head
With Alternate Outboard Tape Drum
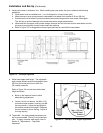
1. Raise upper taping head high enough to allow
clearance for removing lower taping head.
2. Remove lower taping head from machine bed
and install threading needle as explained in
Section II.
3. Replace taping head back into machine.
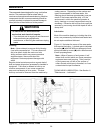
4. Place tape roll on outboard tape drum with
adhesive side down on lead end of tape. (Seat
tape roll fully against back flange of tape drum.)
Thread tape through outboard tape rollers as
shown in Figure 3-5 and adhere tape lead end
to lower end of threading needle.
5. Complete tape threading as explained in
Section II.
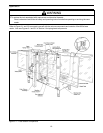
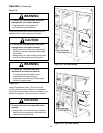
• To reduce the risk associated with mechanical and electrical hazards:
− Turn electrical and air supply off and disconnect before performing any adjustments, maintenance or
servicing the machine or taping heads
• To reduce the risk associated with impact hazards:
− Turn air supply off and be sure flap kicker is down before servicing
− Never operate this equipment with safety interlocks or guarding removed
• To reduce the risk associated with sharp blade hazards:
− Keep hands and fingers away from tape cutoff blades under orange blade guards. The blades are extremely
sharp
• To reduce the risk associated with pinch and entanglement hazards:
− Do not leave the machine running while unattended
− Never attempt to work on any part of the machine, load tape, or remove jammed boxes from the machine
while the machine is running
− Keep hands, hair, loose clothing, and jewelry away from moving belts, taping heads, and flap kicker
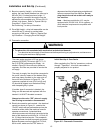
WARNING
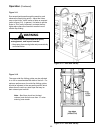
• To reduce the risk associated with muscle
strain:
− Use proper body mechanics when removing or
installing taping heads that are moderately
heavy or may be considered awkward to lift
WARNING