


32
SECTION IX
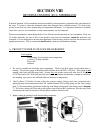
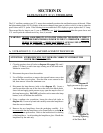
ULTRAVIOLET (U.V.) STERILIZER
The U.V. sterilizer contains a true U.V. sensor that continually monitors the sterilization power of the unit. When
the light emitting diode (L.E.D.) display of the sensor changes from green to yellow or red, it is time to clean the
quartz sleeve and U.V. probe. If the cleaning does not return the L.E.D. display to green, replace the U.V. lamp.
The average life of a lamp is one (1) year of continuous use. It is also recommended that the quartz sleeve and
U.V. sensor probe be cleaned once every four (4) months.
WARNING: NEVER LOOK DIRECTLY INTO THE UNPROTECTED PARTS OF THE UV
CHAMBER WHEN THERE IS POWER TO THE UV STERILIZER. SERIOUS
BURNS TO THE EYES and SKIN MAY RESULT. ALWAYS UNPLUG POWER
TO THE UV STERILIZER BEFORE WORKING ON IT.
A. ULTRAVIOLET (U.V.) LAMP REPLACEMENT PROCEDURE
ATTENTION: STERILIZER WILL NOT OPERATE CORRECTLY WITHOUT THE
COVER PROPERLY CLOSED.
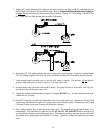
1. Close the products shut-off (refer to diagram 18 on page 33) vend 1
gallon (3.78 liters) or until water stops coming out of the vend nozzle
whichever comes first.
2. Disconnect the power from the machine.
3. Use a Phillips screwdriver to remove the top and bottom screws that
secure the front cover in place. Pivot the front cover outward to the
left, then remove it from the aluminum case.
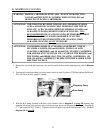
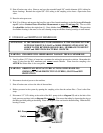
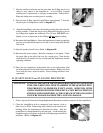
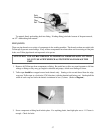
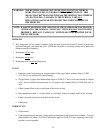
4. Disconnect the lamp harness (refer to the diagram 15). Insert a
small screwdriver into one of the slots at the side of the black plastic
sleeve bolt and apply gentle pressure to pry open the snap-in cover of
the lamp harness plug. DO NOT pull on the cord to remove the lamp
harness, as it will shorten the useful life.
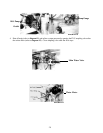
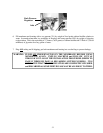
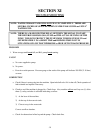
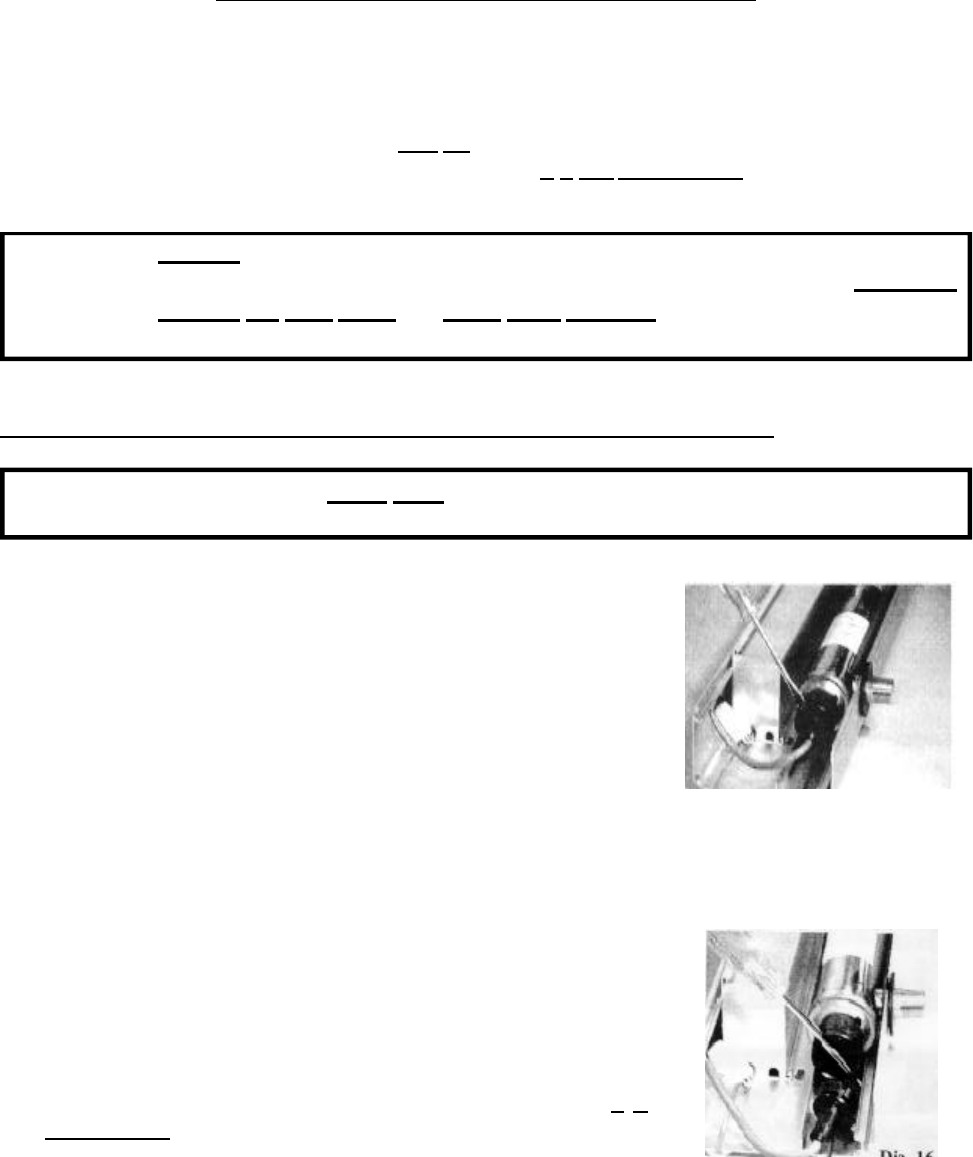
5. Using a medium size screwdriver, loosen the sleeve bolt (refer to
diagram 16). Unscrew by hand and carefully extract the lamp/sleeve
from the reactor chamber.
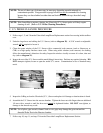
6. Remove the new lamp/sleeve from the packaging carefully. It is
recommended that the lamp/sleeve to be cleaned prior to assembly to
ensure maximum performance. Refer to the instructions for cleaning
of the lamp/sleeve. Avoid touching the lamp/sleeve glass. Handle the
lamp/sleeve by the ends only.
Diagram 15
Apply pressure to pry open
the lamp harness
Diagram 16
Lossening/Tightening
of the Sleeve Bolt