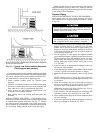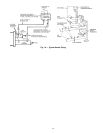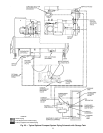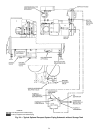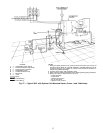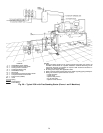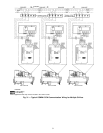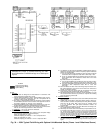
CONNECT CONTROL INPUTS — Connect the control in-
put wiring from the chilled and condenser water flow switches
to the starter terminal strip. Wiring may also be specified for
a spare safety switch and a remote start/stop contact can be
wired to the starter terminal strip. Additional spare sensors
and Carrier Control Network modules may be specified as
well. These are wired to the machine control center as in-
dicated in Fig. 29-31.
Connect only 24 v wiring to the control center.
CONNECT CONTROL OUTPUTS — Connect auxiliary
equipment, chilled and condenser water pumps, and spare
alarms as required and indicated on job wiring drawings.
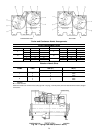
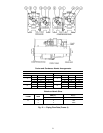
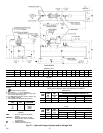
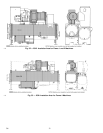
CONNECT STARTER — The 23XL is available with either
a unit-mounted, factory-installed starter or a free-standing,
field-installed starter (Fig. 27 and 28).
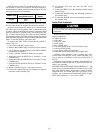
Unit-Mounted, Factory-Installed Starter —Attach power leads
by connecting them from inside the starter cabinet to the line
side circuit breaker terminals. Machines with electro-
mechanical starters (wye-delta) will have a top hat shipped
with the machine if the RLA is greater than 432 amps. The
top hat is shipped in the knocked-down position and must be
assembled and installed on top of the starter cabinet, over
the line side circuit breaker. During assembly, remove the
access plate and use it as the cover piece of the top hat. The
top hat provides additional wire bending space to attach line
side power leads to the circuit breaker within the starter. The
solid-state starter does not require a top hat.
IMPORTANT: Be sure to ground the power circuit in
accordance with the National Electrical Code (NEC),
applicable local codes, and job wiring diagrams. Also,
make sure correct phasing is observed for proper
rotation.
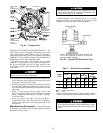
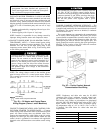
Freestanding, Field-Installed Starter — Assemble and in-
stall compressor terminal box in desired orientation, and cut
necessary conduit openings in conduit support plates. One
side of the box has a 45 degree surface next to the
90 degree surface. This additional surface permits the power
leads to enter the box at an angle which allows greater lead
separation with less bending. In addition, the shape of the
base of the terminal box is square with symmetrical screw
holes on all sides. This permits the cover assembly of the
box to be oriented on the base frame so that the 45 degree
surface mentioned above can be positioned on the top, side
or bottom for greater adaptation with respect to power lead
entry direction. Attach power leads to compressor terminals
in accordance with job wiring drawings, observing caution
label in terminal box. While holding bottom terminal sta-
tionary, torque top nut to 10-15 ft/lb (13.6-20.3 Nm). While
holding bottom terminal nut stationary, torque top nut down
until washer is flat and domeportion is not recognizable (10-15
ft-lb). Use onlycopper conductors. Themotor must be grounded
in accordance with NEC, applicable local codes, and job wir-
ing diagrams.
26


