


10
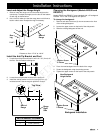
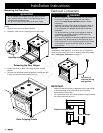
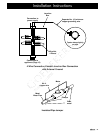
Close the door. Remove and retain the two screws from the
back of the kick panel as shown below. Pull the kick panel
free from the front of the unit.
Remove the left end cap retaining screw from under the rim
of the control panel and remove the end cap.
Hold the left side panel in position on the side of the range.
2.
3.
4.
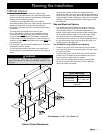
Installation Instructions
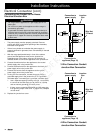
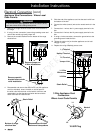
Installing the ERV Trim Kit (Model ER30DSR)
To install a raised vent with self-rimming model ER30DSR, you
must install the optional ERV trim kit.
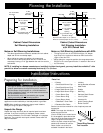
To change the trim on model ER30DSR:
Remove and retain the seven (7) chrome screws that hold
the existing trim pieces in place.
Slide the existing trim pieces off the range.
Slide the new trim pieces onto the range.
Fasten the new trim pieces in place using the existing screws.
Installing the 3 Inch Side Panel Kit
(Model ER30DSR)
For self-rimming installations with non-standard countertop
depths, installation of the optional side panel kit may be necessary
to cover the sides of the range that protrude from the cabinet.
To install the side panel kit:
Open the oven door. Remove and retain the two (2) screws
on the top of the kick panel. The screws are accessed
through the space between the door and the oven opening.
1.
2.
3.
4.
1.
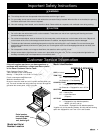
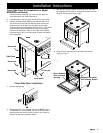
Trim Removal and Installation
End Cap
Remove and
retain screw,
both sides
Kick Panel
Remove and
retain screws
Space between
door and oven
opening
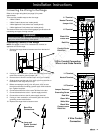
Remove Center Screw on Left Side
Left side only:
Remove and
reuse this screw.
Center mounting
hole
Side Panel