


33
Care and cleaning
Removing odors from refrigerator
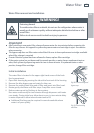
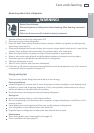
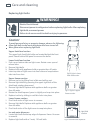
WARNING!
Electric Shock Hazard
Disconnect power to refrigerator before cleaning. After cleaning, reconnect
power.
Failure to do so can result in death or injury to persons.
1
Remove all food and turn the refrigerator OFF.
2
Disconnect power to the refrigerator.
3
Clean the walls, floor, ceiling of cabinet interior, drawers, shelves and gaskets according to the
instructions (see page 32).
4
Dilute mild detergent and brush solution into crevices using a plastic bristle brush. Leave for five
minutes. Rinse surfaces with warm water. Dry surfaces with a soft, clean cloth.
5
Wash and dry all bottles, containers and jars. Discard spoiled or expired items.
6
Wrap or store odor-causing foods in tightly sealed containers to prevent recurring odors.
7
Reconnect power to refrigerator and return food to refrigerator.
8
Allow the refrigerator to cool.
9
After 24 hours, check if odor has been eliminated.
10
If the odor is still present, liquid may have spilled down into the evaporator tray. In this instance
a service call may be required (see page 47).
Energy saving tips
There are many simple things that can be done to save energy.
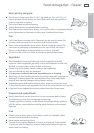
During installation
Locate refrigerator in coolest part of room. Avoid areas of direct sunlight, or near heating ducts,
registers, or other heat producing appliances. If this is not possible, isolate exterior by using a
section of cabinet or an added layer of insulation.
Be sure the doors are closing securely by leveling refrigerator.
During Use
Avoid overcrowding shelves, as this reduces airflow.
Do not use anything (such aluminium foil, wax paper, or paper toweling) as a shelf liner, as this
reduces air flow.
Avoid adding too much warm food all at once, as this reduces cooling power.
Your refrigerator is most efficient when two thirds full.
Organize items in refrigerator to reduce the time that the door is open.
Maintenance
Clean door gaskets every three months (see page 32).
Clean condenser coils (see page 32).
EN