


– 20 –
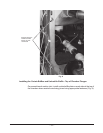
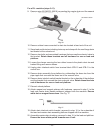
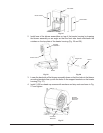
29. Remove two bolts, nuts, and washers attached to the load support bracket
shipped with the machine (00-950109). See Fig. 19.
TWO STUDS
00-950109
Bottom View (R-L Machine)
Fig. 19
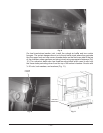
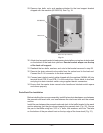
30. Attach load support bracket to load master drain platform using two studs located
on the bottom of the load drain platform. Ensure bracket wraps over the top
of the back rail support.
31. Reattach the two bolts, washers, and nuts to the bracket removed in step 29.
32. Reroute the drain solenoid valve cable from the unload end to the load end.
Connect the D.I.N. connector to the drain solenoid.
33. Connect new interlock switch cable shipped with the machine (949844-40) into
terminal block 8TB-10 and 8TB-11 in the control box. Route cable to load end
and plug into drain interlock switch using supplied electric connectors.
34. Ensure that the master drain manual valve handle and interlock switch opens
and closes properly.
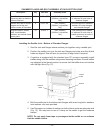
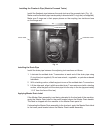
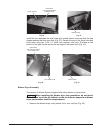
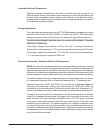
Drain Back Pan Installation
Before installing the conveyor assembly, install the two drain back pans; one between
the prewash and wash tank, and one between the dual rinse tank and the unload
section.
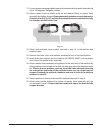
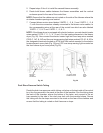
Installthepanbetweentheprewashandwashtanktothebafelocatedinthewash
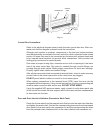
section ensuring that the pan slopes towards the prewash tank (Fig. 20). Secure
thepantothebafeusingfour¼-20x½”bolts,lockwashers,andnuts.Thetabs
on the bottom of the pan should rest on the top edge of the lower track (Fig. 21).