


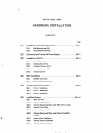


SECTION 200 HARDWARE INSTALLATION
210
Installation of the
Key
Service
Unit
210.1 Wall Mounting the KSU
1.
2.
. .
3.
2
I (
The ES -6-l
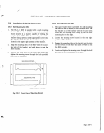
KSU is supplied with a wall mounting
bracket. The bracket should be mounted on a back-
board secured in a manner capable of holding the
weight of the KSU. With the mounting tabs of the
bracket facing upward, install appropriate screws into
the 6 holes of the bracket. Loosen the securing screw
located in the upper right position of the bracket.
Align the mounting slots of the KSU with the mount-
ing tabs of the bracket, and push down to seat the
KSU
securely.
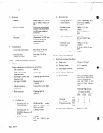
Remove the front cover of the KSU, and locate and
tighten the securing .screw through the hole provided
above the J 1 connector.
0
0
0
-
SECURING SCREW \
\
210.2
Floor Mounting the KSU
1.
2.
3.
4.
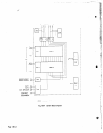
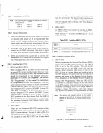
The same bracket that is provided for wall mounting
can also be used to anchor a floor mounted KSU. Set
the bracket on a level surface with the 6 screw holes
down and the securing screw facing up and the floor
mounting slot to the right.
Loosen the securing screw located in the rear right
position of the bracket.
Engage the mounting tabs on the bracket into the slots
on the bottom of the KSU and push forward to seat
’
the KSU securely.
Locate and tighten the securing screw through the hold
provided on the bottom panel of the KSU.
FLOOR MOUNTING SLOT
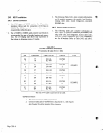
Fig. 210-l Front View of hbunting Bracket
Page