


18
Model 142Operating Procedures
120529
Brush Cleaning
Step 1
Prepare a sink with a n approved cleaning solution (ex-
amples: Kay- 5R or Stera- SheenR). USE WARM
W ATER A ND FOLLOW THE MANUFACTURER’S
SPECIFICATIONS. (IMPORTANT: Follow the label
directions. A STRONG solution can cause parts dam-
age. A M ILD solution will not provide adequate clean-
ing.) Make sure all br ushes provided with the freezer
are available for br ush cleaning.
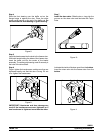
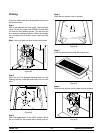
Step 2
Remove the cup seal from the drive shaft of the beater
assembly.
Step 3
From the freezer door, remove the design cap, draw
valve handle,valve lifterarm, and draw valve. Remove
all o- rings.
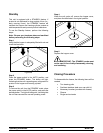
Note: To remove o- rings, use a towel to grasp the
o- ring. Apply pressure in an upward direction until the
o- ring pops out of its groove. With the other hand,
push the top o f the o- ring forward, and it will roll out of
the groove and can be easily removed. If there is more
than one o- ring to be removed, always remove the
rear o- ring first. This will allow the o- ring to slide o ver
the forward rings without falling into the open grooves.
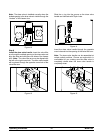
Step 4
Remove the large o- ring, the front bearing, and the
guide bearing from the back of the freezer door.
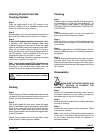
Step 5
Thoroughly brush clean all disassembled parts in the
cleaning solution, makingsureall lubricantand mixfilm
is removed. Take particular care to brush clean the
draw valve core in the freezer door. Place all the
cleaned parts on a clean, dry surface to air dry
overnight.
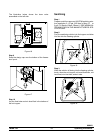
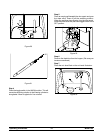
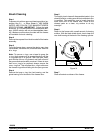
Step 6
Return to the freezer with a small amount of cleaning
solution. With the black bristle brush, brush clean the
rear shell bearing at the back o f the freezing cylinder.
Figure 31
Step 7
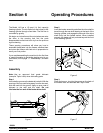
Clean all exterior surfaces of the freezer.