


35
Models 8752, 8756, 8757 Operating Procedures
Step 7
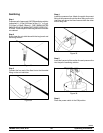
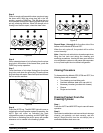
Using the long, flexible brush and the cleaning
solution, clean the mix inlet tube(s) located in the mix
cabinet. Thoroughly clean the tube(s) all the way up to
the freezing cylinder. This area needs special attention
because bacteria and milkstone can build up here.
Step 8
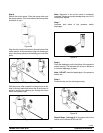
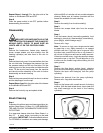
Remove the rear drip pan from the side panel and take
it to the sink for cleaning.
Note: If the rear drip pan is filled with an excessive
amount of mix, refer to the T roubleshooting Guide.
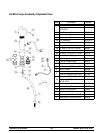
Step 9
Thoroughly brush clean all disassembled parts in the
cleaning solution, making sure alllubricant andmix film
is removed. Take particular care to brush clean the
draw valve core(s) in the freezer door. Place all the
cleaned parts on a clean dry surface to air dry
overnight.
Step 10
Wipe clean all exterior surfaces of the freezer and the
mix cabinet.
Check Topping Pump Temperature
and Volume - Model 8757
To check the topping pump temperature and volume
on the Model 8757 the following items will be needed:
S Digital thermometer with needle probe
S calibrating cup
S flatblade screwdriver
S sanitizer (examples: Stera SheenR or
Kay- 5R)
Note: This procedure should be performed on a
morning after the pumps were disassembled and
cleaned, on a monthly basis.
1. Dispense one serving of topping into a sundae
cup.
2. Insert the sanitized needle probe into the
topping. Let the probe stabilize for 20 seconds.
Note: Topping temperature should be between 115_
and 125_F(46_ and 52_C) and must be this
temperature before pump calibration can begin. Water
bath temperature should be between 135_ and 145_F
(57_ and 63_C).
3. If the temperature is too cold or too warm, it
can be adjusted by the temperature control
located inside the machine, on the back of the
topping compartment.
4. Using the flatblade screwdriver, loosen and
remove the screws from the lower right panel.
Locate the adjustment screws, one for each
water bath.
5. Using a flatblade screwdriver, turn the
adjustment screw CLOCKWISE to INCREASE
and COUNTERCLOCKWISE to DECREASE
the water bath temperature. Adjust in small
increments.
6. Allow 10 minutes for the temperature to
stabilize in the water bath.
7. Check the temperature again in the water bath.
8. Place the topping pump back into the container.
9. Repeat these steps for the other topping. Install
the lower right panel, if applicable, and install
the screws.
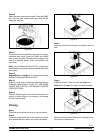
10. Hold the small chamber of the calibrating cup
under the dispensing nozzle.
11. Push the dispensing lever down for one full
stroke. The topping should be directed to the
bottom of the calibrating cup. Do not allow the
topping to fall on the sides of the cup.
Note: The amount of dispensed topping should be
one fluid ounce (29.6 ml).
12. If the dispensed amount is correct, proceed to
Step 13. If the amount of dispensed topping is
not correct, consult the Troubleshooting Section
of your Equipment Manual
13. Repeat Steps 10 through 12 for the other
topping pump, then proceed with Step 14.
14. Topping pump temperature and volume check
is complete.