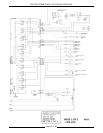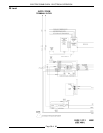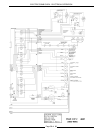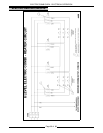
ELECTRIC COMBI OVEN - ELECTRICAL OPERATION
Page 53 of 68
NOTE
: To display the actual probe temperature
for 5 seconds, press and hold the probe key.
3. Press Start key to begin the cooking cycle.
A. Start LED on.
NOTE
: The probe temperature can be adjusted
throughout the cooking cycle by pressing the probe
key and rotating the adjustment. The adjusted
temperature is retained in memory and is displayed
when the time key is pressed.
4. Internal product temperature reaches probe set
point temperature.
A. Buzzer sounds.
1) Press the Start key to silence the
buzzer.
a. Start LED off.
B. Probe temperature flashes in the time
display.
C. Probe method remains selected with probe
Led on.
D. Probe temperature remains as entered
and is displayed in the time display.
Powering Down
1. The control can be in any heating mode and
the door in the open or closed position.
2. Rotate the selector knob to off.
NOTE
: There is a 5 second time delay after
selecting the off position to cancel the shut down
sequence and resume normal operation.
A. Displays and LED’s turn off.
B. All power removed from the heating
elements and cavity fan(s).
C. Vent motor energized and operates till
vent opens.
D. Door unlocks and opens.
E. Drain pump activated for 45 seconds on 6
and 10 levels; 60 seconds on 20 levels.
3. At the end of the drain cycle.
A. Cavity lamp de-energized.
B. Cooling fan(s) de-energized.
C. Cavity vent closes.


