


15628-9-1007Page 12
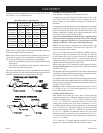
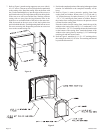
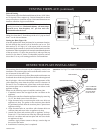
7. Refer to Figure 8, attach casting support to rear cover with (4)
10 x 1/2" screws. The rear cover has (4) keyholes for attachment
to the casting sides. Stand the casting sides on the floor with
the (2) bolts attached half-way into the edges of the rear cover
positioned at the rear. The large diameter holes in the keyholes
of the rear cover will be toward the floor. Working with one
casting side at a time, place the large diameter holes in the
keyholes over and behind both of the bolts at the same time.
Push downward on the rear cover to lock the keyholes into
position behind the bolts. Finish tightening both bolts to secure
rear cover to casting side. Repeat this procedure to secure rear
cover to the second casting side.
Figure 8
8. Position the completed portion of the casting in the approximate
location for installation as the completed assembly will be
heavy.
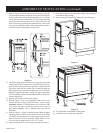
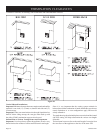
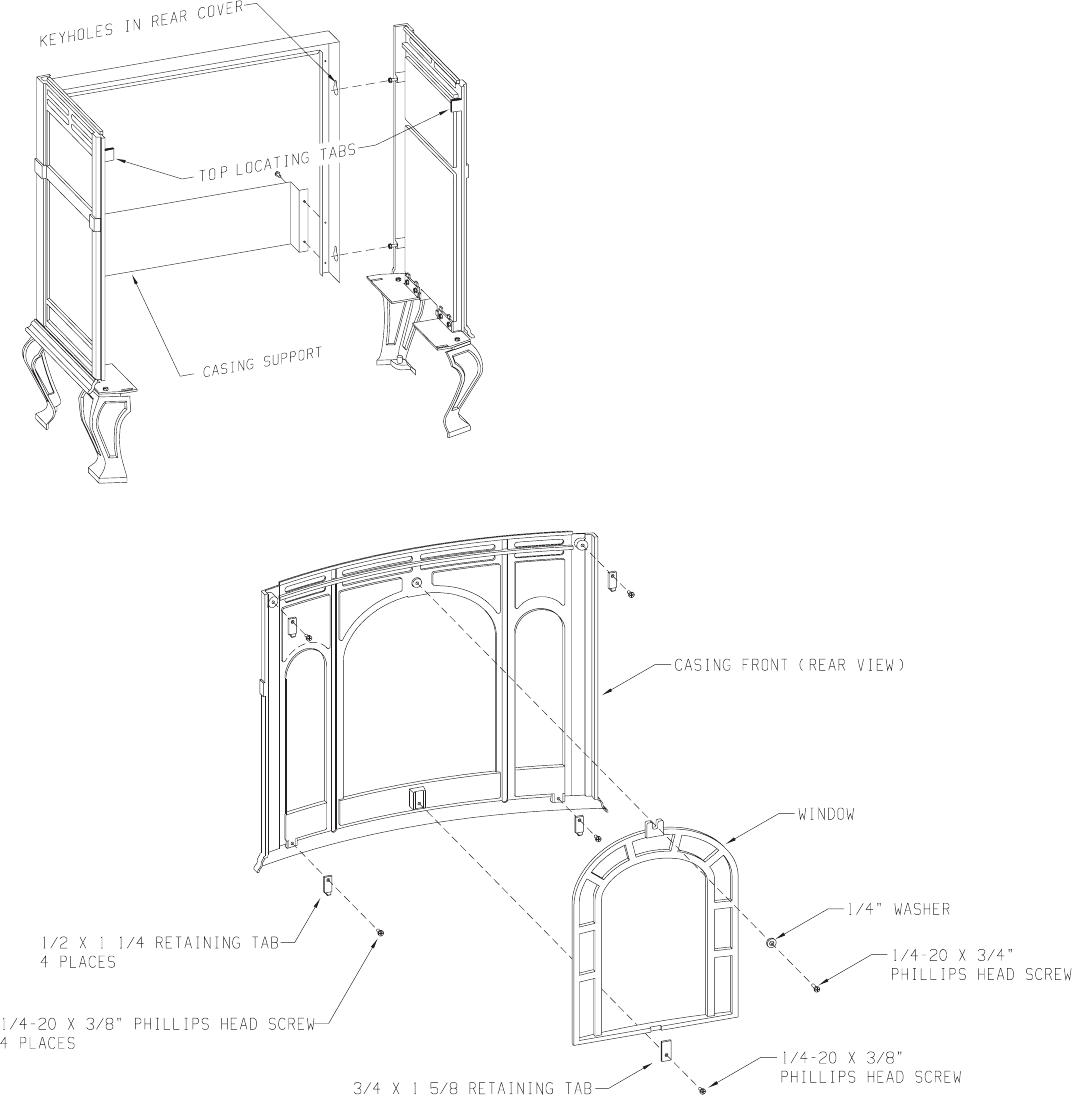
9. Refer to Figure 9, remove protective packing foam from
casting front and window. Remove the (1) 3/4" bolt and (1)
1/4" washer from top of window. Remove (1) 3/8" bolt and 1
- 5/8" x 3/4" retaining tab from bottom of window. Remove
the window from casting front. Remove the protective sheet
of foam from the casting front.
Place the window into the casting front. Attach the top of the
window to the casting front with (1) 1/4" washer and (1) 3/4"
bolt. Place the 1 -5/8" x 3/4" retaining tab into the locator notch
on the bottom of the casting front. Attach the bottom of the
window to the casting front by inserting (1) 3/8" bolt through
retaining tab and into locator notch.
10. Refer to Figure 9, attach the (4) 1-1/4" x 1/2" retaining tabs to
the casting front with (4) 3/8" bolts. The retaining tabs should
be positioned downward.
Figure 9