Installation and Initialization AP-700 User Guide
Hardware Installation
20
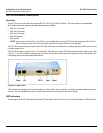
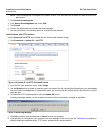
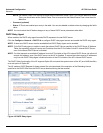
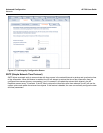
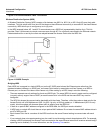
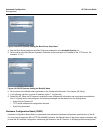
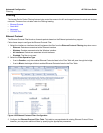
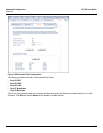
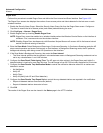
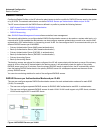
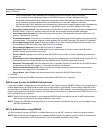
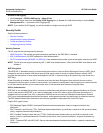
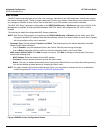
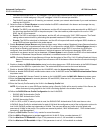
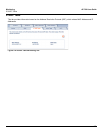
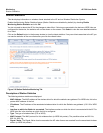
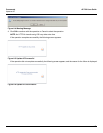
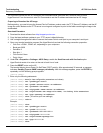
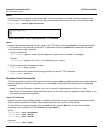
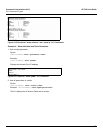
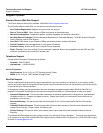
Install the Security Cover (Optional)
You can optionally install a security cover to deter unauthorized access to the unit. The security cover is a plastic
enclosure that prevents access to the cabling and the Reset and Reload buttons.
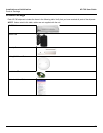
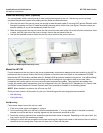
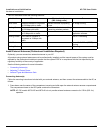
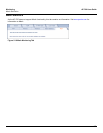
1. Open the split end of the security cover just enough to slide the power cable (if not using PoE) and the Ethernet cable
through the opening until they fit inside the straight clamping portion of the cover (see figure). Exercise care as you
slide the cable(s) so you do not accidentally break the cover.
2. Slide the hinging end of the security cover into the hole on the rear panel of the unit to the left of the connectors. Once
in place, pivot the right side of the cover to bring it close to the rear panel of the unit.
3. Use the two attached screws to fasten the security cover onto the rear panel of the unit.
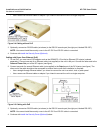
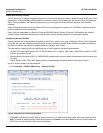
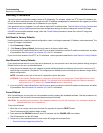
Figure 2-6 Installing the Security Cover
Mount the AP-700
Proxim recommends that you have a site survey professionally conducted to determine the best location for the AP. For
professional site surveyors, Ekahau Site Survey software is included in the Xtras folder on the Installation CD-ROM.
Note that the AP-700 has been certified under UL Standard 2043 and can be installed in the plenum. In an office building,
plenum is the space between the structural ceiling and the tile ceiling that is provided to help air circulate. Many
companies also use the plenum to house communication equipment and cables. These products and cables must
comply with certain safety requirements, such as Underwriter Labs (UL) Standard 2043: “Standard for Fire Test for Heat
and Visible Smoke Release for Discrete Products and Their Accessories Installed in Air-Handling Spaces”.
NOTE: When installed in a plenum, the AP must use PoE.
Once you have chosen a final location for your unit, the following are the mounting options are available:
• Wall Mounting
• Ceiling Mounting
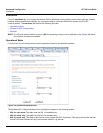
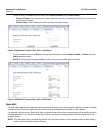
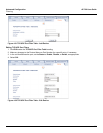
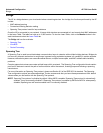
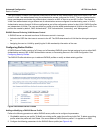
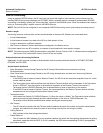
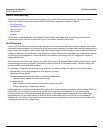
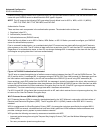
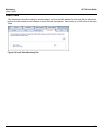
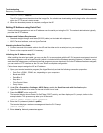
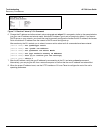
Wall Mounting
Follow these steps to mount the unit on a wall:
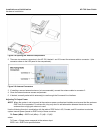
1. If the unit’s power supply is plugged in, unplug it.
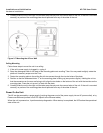
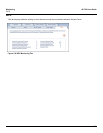
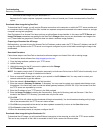
2. Put the mounting plate up to the wall so that the embossed letter “L” is on top (see figure). If the plate is correctly
oriented, the circular tab that is vertically aligned with the square hole should be on top.
3. Fasten the mounting plate with two screws through the circular holes of the plate. Depending on the type of wall, you
may need to use the two fasteners provided.
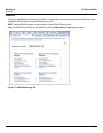
4. Holding the unit so that the connectors on the rear are facing left, align the two holes on the bottom of the unit with the
two tabs on the mounting plate. Press the unit down so it is flush with the plate.