


17
SERVICE (Cont.)
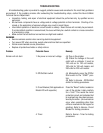
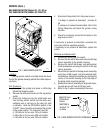
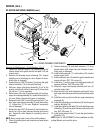
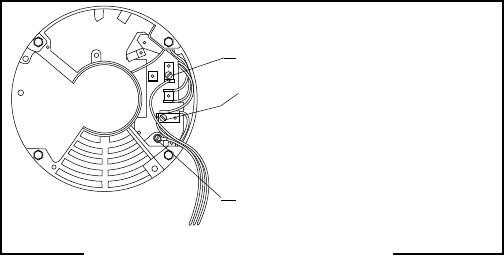
WHI/BLU to
Relay N.O.(K4)
WHI to Cordset (120V)
RED/BLK to Cordset (230V)
GRN to Ground (120V)
GRN/YEL to Ground (230V)
P1310
FIG. 4 AC MOTOR TERMINALS
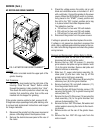
11. Clean all grinding burrs and mounting surfaces
before reassembly.
12. Install the four .250”-20 cage nuts on the new
motor.
13. Place the new motor with hopper collar and bush-
ing into position on the bushings on the motor
mounting bracket.
14. Using four .250”-20 screws, flat washers and
rubber washers secure the motor to the mounting
bracket.
15. Install stationary burr (9) to the grind chamber
housing using two .250”-20 screws.
16. Install burr (7) and burr auger rotor/spring as-
sembly (3) on to motor shaft.
17. Install motor shaft extension (11) on motor
shaft.
18. Align the slot in the motor shaft extension (11) with
the slot in the burr auger rotor/spring assembly
(6) and install shear plate (4).
AC MOTOR AND GRIND CHAMBER (cont.)
19. Install burr rotor cup (5).
20. Install grind selector dial plate and grind selector
knob assembly on the grind chamber housing and
secure with two .250”-20 screws.
21. Refer to Fig. 4 and reconnect the wires.
22. Refer to ADJUSTMENTS in the Installation and
Operating Manual, and reset the burrs.
41545 122209