5-3
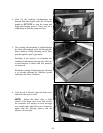
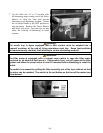
c. Hold the knob and carefully tighten the setscrew.
d. Recheck the thermometer/pyrometer reading against the thermostat knob setting the next
time the burner lights.
e. Repeat steps 4.a through 4.d until the thermometer/pyrometer reading and knob setting agree
within ± 5ºF (2ºC).
5. Remove the thermometer or pyrometer.
If calibration cannot be obtained, call a Factory Authorized Service Center for assistance.
Check Thermostat Controller Thermostat Calibration
(NOTE: This check applies only to units equipped with Thermostat Controllers.)
1. Set the temperature control knob to 325°F (162°C) and insert a good grade thermometer or
pyrometer into the frypot so that it touches the temperature probe guard.
2. When the burner cycles off, set the temperature control knob to 340°F (170°C). As the reading
on the thermometer or pyrometer nears the control knob setting, but before the burner cycles off,
reset the knob to 325°F (162°C). Just as the reading on the thermometer or pyrometer drops
below 325°F (162°C), the burner should cycle on. If it does not, calibration is required. Call
your Factory Authorized Service Center (FASC) to arrange this service.
Check Computer Magic III Set Point Accuracy
(NOTE: This check applies only to units equipped with Computer Magic III Controllers.)
Insert a good-grade thermometer or pyrometer probe into the oil/shortening, with the end touching
the fryer temperature-sensing probe.
1. When the computer display shows a series of four dashes "
" with no dot between the
first and second dashes (indicating that the oil/shortening temperature is plus/minus 20°F within
setpoint), press the switch once to display the temperature of the cooking oil or shortening as
sensed by the temperature probe.
2. Press the switch twice to display the setpoint.
3. Note the temperature on the thermometer or pyrometer. All three readings should be within ±
5ºF (2ºC) of each other. If not, contact a Factory Authorized Service Center for assistance.
Clean Gas Valve Vent Tube
(NOTE: This check applies only to Non-CE units without electronic ignition.)
1. Carefully unscrew the vent tube from the valve (NOTE: The vent tube may be straightened.)


